Loyalty Program

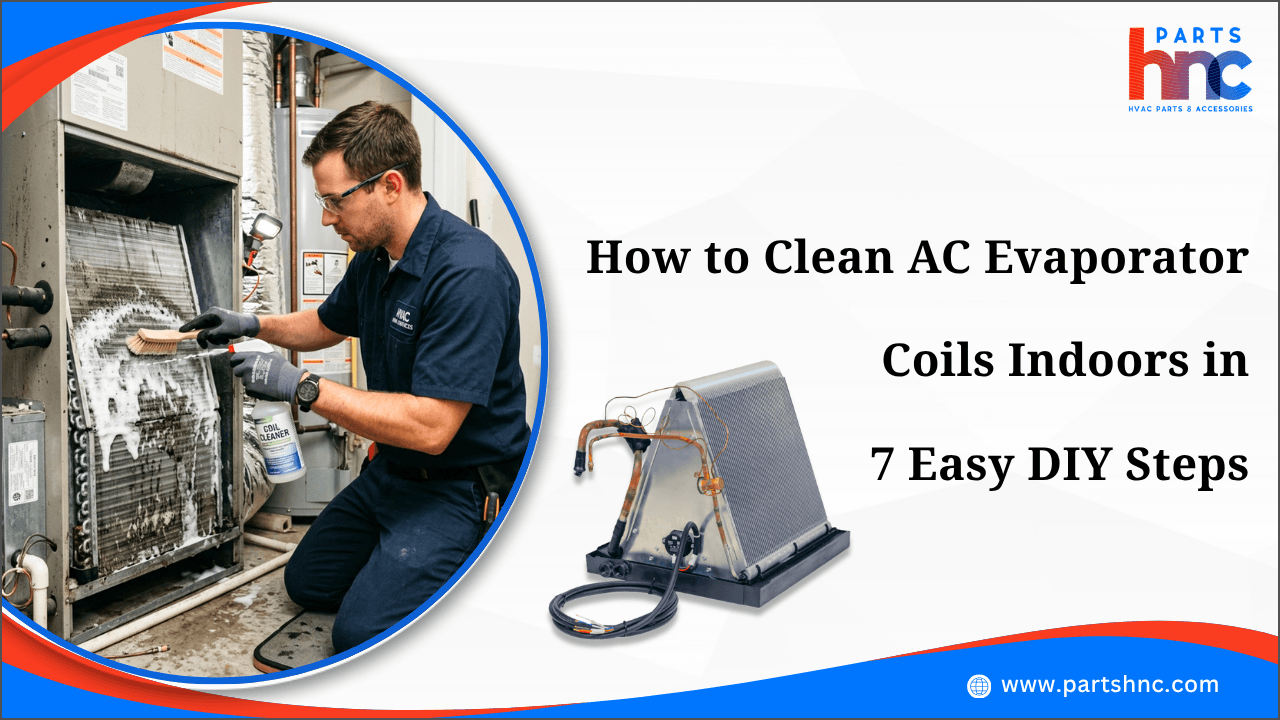
How to Clean AC Evaporator Coils Indoors in 7 Easy DIY Steps
A dirty evaporator coil can reduce your air conditioner’s efficiency, forcing it to work harder while using more energy. Dust, pet hair, and debris buildup restrict airflow and limit heat transfer, causing longer cooling cycles, uneven temperatures, and extra stress on HVAC components.
Cleaning indoor AC evaporator coils is a manageable DIY task with proper tools and safety measures. This guide covers seven simple cleaning steps, important precautions, common mistakes to avoid, and maintenance tips to help maintain reliable cooling performance.
How Cleaning Indoor AC Evaporator Coils Improves Performance
Indoor AC evaporator coils are essential for efficient heat transfer and cooling performance. Regular cleaning improves system efficiency and helps prevent common performance issues. Here are the key benefits:
-
Maintains Efficient Heat Exchange: Clean coil surfaces absorb indoor heat more effectively.
-
Supports Balanced Refrigerant Performance: Better heat transfer helps the refrigerant complete its cooling cycle efficiently.
-
Reduces Airflow Resistance: A clean coil allows conditioned air to move freely through the air handler.
-
Prevents Moisture Buildup: Removing dirt helps condensate drain properly, reducing excess moisture around the coil.
-
Protects Temperature Sensors: Clean coils allow nearby sensors to provide more accurate system readings.
-
Minimizes Unnecessary System Strain: Efficient coil operation reduces stress on connected HVAC components.
-
Helps Maintain Consistent Indoor Comfort: Proper heat absorption supports stable cooling throughout the home.
7 Easy Steps to Clean AC Evaporator Coils Indoors
Cleaning indoor AC evaporator coils helps improve cooling efficiency and airflow. Below are the steps:
Step 1: Turn Off Power to the AC Unit
Turn off the thermostat and disconnect power at the circuit breaker before opening the unit. Confirm the system cannot restart unexpectedly to ensure safe cleaning.
Step 2: Access the Evaporator Coil
Open the indoor air handler or furnace cabinet by removing the access panel. Use a flashlight to inspect the coil for dust, dirt, mold, or debris.
Step 3: Remove Loose Dirt and Debris
Gently remove surface dirt with a vacuum using a soft brush attachment or a soft-bristle brush. Always clean in the direction of the fins to avoid bending them.
Step 4: Apply Evaporator Coil Cleaner
Spray a no-rinse evaporator coil cleaner evenly over the coil surface. Follow the product instructions and avoid spraying electrical components.
Step 5: Allow the Cleaner to Work
Leave the cleaner on the coil for 5–10 minutes so it can loosen accumulated dirt and residue. Reapply if necessary for heavily soiled coils.
Step 6: Wipe Away Remaining Residue
Use a damp microfiber cloth to clean accessible areas if residue remains. Rinse only when recommended by the cleaner manufacturer.
Step 7: Reassemble and Test the System
Reinstall the access panel, restore power, and switch on the thermostat. Run the AC for several minutes to check airflow, cooling performance, and proper operation.
Learn how mini-split systems adapt to seasonal temperature changes by automatically adjusting heating and cooling output.
How to Identify a Dirty AC Evaporator Coil
A dirty evaporator coil can reduce cooling efficiency and affect overall HVAC performance. Identifying early warning indicators helps you address buildup before it leads to larger system problems. Pay attention to these early warning signals:
-
Longer Cooling Cycles: The AC takes more time than usual to reach the desired temperature.
-
Reduced Humidity Removal: Indoor air feels damp even while the system is running.
-
Frequent Compressor Operation: The outdoor unit runs longer because the coil cannot absorb heat efficiently.
-
Condensation Near the Air Handler: Excess moisture around the indoor unit may indicate restricted coil performance.
-
Dust Visible On The Coil Surface: Dirt buildup on accessible sections of the coil often signals that cleaning is needed.
-
Higher Supply Air Temperature: Air leaving the vents feels less cool despite normal thermostat settings.
-
Inconsistent Cooling Performance: Some rooms remain warmer due to reduced heat transfer across the evaporator coil.
When to Call an HVAC Professional
DIY cleaning is suitable for light to moderate dirt buildup. However, call a professional if:
-
The coil is heavily impacted with debris.
-
You see mold growth.
-
The coil is frozen repeatedly.
-
Refrigerant lines are leaking.
-
The system still cools poorly after cleaning.
-
You are uncomfortable opening the HVAC cabinet.
Professional technicians can perform deep cleaning and inspect the entire system for hidden issues.
Discover the top 10 air vent covers that solve common HVAC issues.
Common AC Evaporator Coil Cleaning Mistakes
Cleaning an AC evaporator coil requires proper techniques to avoid performance issues and system damage. Avoid these common cleaning errors:
Inspection And Preparation Mistakes
-
Skipping Coil Condition Checks: Failing to inspect the coil before cleaning can hide issues like corrosion, damaged fins, or heavy buildup that require special care.
-
Ignoring Surrounding Components: Overlooking nearby sensors, wiring, and drain pans can lead to accidental damage during the cleaning process.
-
Using Incorrect Access Methods: Forcing access panels or removing parts incorrectly may damage cabinet components and seals.
Cleaning Process Mistakes
-
Over-Wetting the Coil Area: Excess moisture can reach electrical components and create unnecessary system problems.
-
Cleaning Only the Visible Surface: Dirt hidden between coil layers can continue restricting airflow if deeper areas are ignored.
-
Applying Excessive Cleaner: Using too much solution may leave residue that attracts more dust and affects coil performance.
After-Cleaning Mistakes
-
Failing to Check Drain Flow: A clean coil still requires proper drainage to prevent water accumulation inside the unit.
-
Skipping Airflow Verification: Not checking airflow after cleaning can leave performance issues unnoticed.
-
Neglecting Regular Cleaning Intervals: Waiting until cooling problems appear can allow minor buildup to become a major efficiency issue.
Summary: Maintain Better Cooling With Proper Evaporator Coil Care
Keeping your indoor AC evaporator coil clean supports reliable cooling, improved airflow, and smoother HVAC operation. A well-maintained coil allows the system to transfer heat effectively while reducing unnecessary strain on connected components. Following proper cleaning methods and regular maintenance practices helps prevent performance issues and extends the service life of your air conditioner.
Key Takeaways
-
Check coil condition periodically to identify buildup before cooling performance declines.
-
Protect delicate coil fins during cleaning to maintain proper airflow through the system.
-
Use HVAC-specific cleaning solutions that are suitable for evaporator coil surfaces.
-
Ensure the condensate drain area remains clear after cleaning to prevent moisture problems.
-
Avoid disturbing sensors, wiring, and nearby components during coil maintenance.
-
Monitor cooling changes after cleaning to confirm improved system operation.
-
Seek professional assistance for damaged coils, refrigerant concerns, or severe contamination.
Planning to replace or upgrade your AC? Shop quality HVAC parts and supplies from PartsHnC, including evaporator coils, compressors, motors, capacitors, thermostats, and more from trusted brands like Carrier, Goodman, Rheem, Lennox, and York, with fast doorstep delivery.
References:
https://www.carrier.com/us/en/residential/evaporator-coils/
https://www.ahrinet.org/scholarships-education/education/homeowners/how-things-work/air-conditioning-system
https://www.energy.gov/energysaver/air-conditioning
FAQs
Can I Clean My AC Evaporator Coil Without Removing It?
Yes. Most indoor evaporator coils can be cleaned without removal by opening the access panel, removing loose debris, and applying a suitable no-rinse coil cleaner.
What Is The Best Cleaner For Indoor AC Evaporator Coils?
Use a commercial evaporator coil cleaner designed specifically for indoor HVAC systems. No-rinse foaming cleaners are commonly used for effective and safe coil cleaning.
How Do I Know If My Evaporator Coil Is Dirty?
Common indicators include weak airflow, increased energy costs, ice buildup on refrigerant lines, uneven cooling, musty smells, and longer AC operating cycles.
Can A Dirty Evaporator Coil Cause My AC To Freeze?
Yes. Dirt buildup can restrict airflow over the coil, causing temperatures to drop too low and leading to ice formation on the coil or refrigerant lines.
How Long Does It Take To Clean An Indoor AC Evaporator Coil?
A typical DIY coil cleaning takes about 30–60 minutes, depending on coil accessibility, cleaning method, and the amount of accumulated dirt.
|
Disclaimer: This article provides general information about AC evaporator coil cleaning methods, maintenance tips, and safety practices that may vary depending on your HVAC system and installation conditions. |