Why 35% of Williams Heater Issues Start with These 3 Key Parts
In commercial and residential heating systems, reliability is essential, especially during peak winter seasons when failures can become costly and disruptive. Nearly 35% of Williams heater issues are linked to three key components: the thermostat, ignition system, and blower motor. When any of these parts begin to fail, the system may show reduced efficiency, uneven heating, or complete shutdowns.
In this guide, we will explore how these core components affect performance, why they fail, and what warning signs to look for. Understanding them is crucial for preventing breakdowns and extending heater life while keeping your Williams heater running efficiently year-round.
How Williams Heater Issues Impact Long-Term Performance
When a Williams heater begins to malfunction, the impact is rarely limited to a single symptom. Small issues often snowball into larger system inefficiencies. Ignoring early warning signs can lead to:
-
Heat Exchange Stress and Reduced Thermal Transfer Efficiency: When airflow or combustion balance is disrupted, the heat exchanger works under uneven thermal load. This gradually reduces heat transfer efficiency and can create internal overheating zones.
-
Sensor Feedback Distortion and Faulty Regulation: Faulty sensors or thermostats may send incorrect temperature signals to the system. This causes improper heating cycles, leading to overcooling or overheating.
-
Airflow Imbalance Inside the Combustion Chamber: Blocked vents or weak blower performance disrupt proper airflow inside the system. This results in unstable combustion and inconsistent flame quality.
-
Control Circuit Overcompensation and Logic Strain: Repeated system faults force the control board to continuously adjust operations. Over time, this strains electronic components and reduces system accuracy.
-
Progressive Efficiency Drift Over Operating Cycles: Williams heaters often lose efficiency gradually instead of failing suddenly. Each operating cycle slightly reduces performance, leading to long-term energy loss.
A minor fault in one component can strain the system, reducing performance and lifespan over time.
Tired of dealing with malfunctioning heater parts? Shop HVAC parts and supplies for home and commercial systems from PartsHnC. We offer Williams heater replacement parts like thermocouples, pilot generators, gas valves, thermostats, ignition components, burners, and wiring kits from top brands like Navien, Rheem, AO Smith, and Williams, with fast delivery straight to your door!
The 3 Key Williams Heater Parts You Should Never Ignore
Williams heaters depend on a few essential internal components that directly affect ignition, heat output, and system safety. If any of these parts start to fail, performance issues usually appear early. Monitor these 3 key components in both home and commercial setups.
1. Thermostat
Thermostat calibration drift over time can cause the heater to respond incorrectly even when the room temperature is stable. This leads to a subtle performance imbalance rather than an obvious failure.
Critical Issues to Watch For: Slow response delay between temperature change and system activation, sensor “overshooting” target temperature, and inconsistent cycle timing.
Solution: Use a digital thermometer or HVAC diagnostic tool to compare the room temperature or thermostat reading. Reposition the thermostat away from heat sources and airflow paths. Perform a calibration reset using manufacturer settings or a multimeter-based check if applicable. If issues continue, replacement is recommended.
Tip for Homeowners & Commercial Use:
-
Homeowners: Recalibrate before winter and check every 3–6 months.
-
Commercial: Inspect every 1–2 months due to higher HVAC load and frequent door usage.
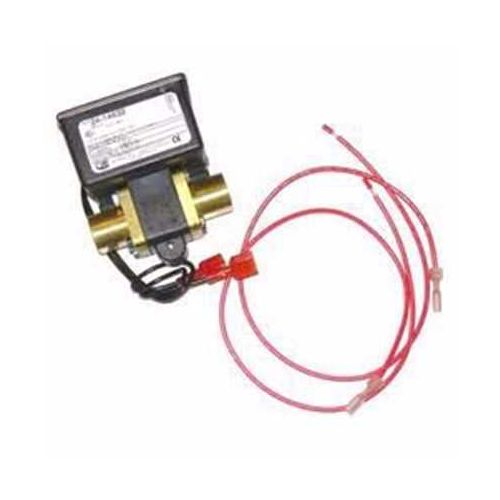
2. Thermopile
Thermopile degradation often happens gradually, reducing voltage output instead of causing sudden failure. This leads to unstable burner operation even when the pilot flame appears normal.
Critical Issues to Watch For: Fluctuating flame stability after ignition, delayed main burner activation, and weak holding voltage from the thermopile.
Solution: Use a multimeter to test the millivolt output under flame load. Clean oxidation using a fine abrasive pad and ensure strong pilot flame contact on the sensor tip. Check wiring continuity for resistance or looseness. Replace the thermopile if the voltage remains below the manufacturer's range even after cleaning.
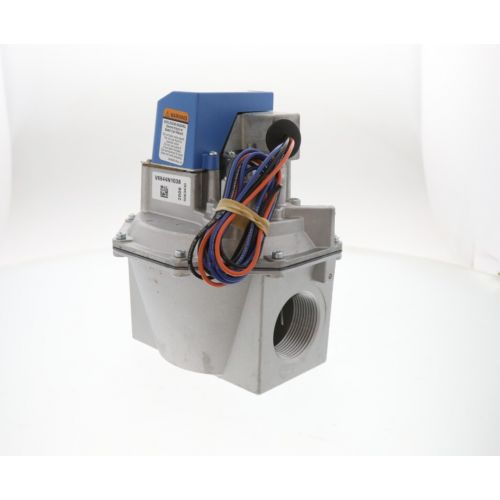
3. Gas Valve
Gas valve issues often begin with internal response lag or partial flow restriction rather than complete shutdown. This can cause irregular burner performance even when ignition appears normal.
Critical Issues to Watch For: Delayed gas release during ignition, intermittent flame drop, and uneven burner pressure behavior.
Solution: Use a gas pressure gauge to verify inlet and outlet pressure stability. Inspect the system with a leak detection solution and check wiring signals with a multimeter (for electronic valves). Ensure proper gas flow by clearing line contamination if present. If irregular response continues after pressure normalization, replacement is required.
Tip for Homeowners & Commercial Use:
-
Homeowners: Annual professional inspection before winter.
-
Commercial: Inspection every 3–6 months due to higher load and strict safety requirements.
Early Warning Signs in Williams Heater Systems
Williams heater warning signs help avoid expensive failures. Minor faults can quickly escalate if missed. Early action reduces risk and cost. Here are the early signs you should watch for:
|
Warning Sign |
Estimated Occurrence Frequency |
Likely Cause |
Risk Level |
|
Wall overheating near the unit |
50–60% |
Poor ventilation or excess internal heat buildup |
High |
|
Pilot lights but burner does not ignite |
65–75% |
Faulty thermocouple or gas control issue |
High |
|
Heater works only intermittently |
55–65% |
Gas valve issues or loose electrical connections |
High |
|
Clicking sound with no ignition |
60–70% |
Ignition failure or restricted gas flow |
High |
|
Weak or unstable pilot flame |
45–55% |
Dirt buildup, low gas pressure, or airflow issues |
Medium–High |
|
Heater shuts off due to overheating |
40–50% |
Blocked airflow or safety shutdown trigger |
High |
Let’s Look at Williams Heater Warning Signs in Detail:
Sign 1: Wall overheating near the unit
The wall around the heater becomes unusually hot during normal operation. This can indicate poor ventilation or excessive internal heat buildup. If ignored, it may become a serious fire safety concern.
Sign 2: Pilot lights but burner does not ignite
The pilot flame turns on, but the main burner fails to ignite or shuts off quickly. This often points to a faulty thermocouple or gas control issue. It prevents proper heating even though the system appears to start normally.
Sign 3: Williams' heater works only intermittently
The heater starts and stops without a consistent pattern during use. This is commonly caused by gas valve problems or loose electrical connections. It results in unreliable heating performance.
Sign 4: Clicking sound with no ignition
Repeated clicking noises are heard, but the burner does not light. This usually suggests ignition failure or restricted gas flow. It means the system is trying to start but cannot complete ignition.
Sign 5: Weak or unstable pilot flame
The pilot flame appears small, flickering, or yellow instead of steady blue. This may indicate dirt buildup, poor gas pressure, or airflow issues. It can prevent the heater from functioning correctly.
Sign 6: Williams heater shuts off due to overheating
The unit runs for a short time and then automatically shuts down. This is typically caused by blocked airflow or internal overheating protection. It is a safety response to prevent damage.
Preventive Maintenance Tips for Williams Heater Parts
Williams wall heater parts are a cost-effective solution for long-term use, helping reduce frequent repair issues and improving overall system performance. Below are the key preventive maintenance tips.
-
Clean the burner assembly regularly: Turn off the heater and clean the burner every 3–6 months using a soft brush or compressed air. This helps maintain smooth combustion and steady heating performance.
-
Inspect and clean the pilot assembly or igniter: Check and clean the igniter or pilot area every heating season. This ensures quick ignition and reliable startup whenever the heater is used.
-
Check the flame sensor or thermocouple: Wipe the sensor gently once or twice a year using a fine abrasive pad if needed. This helps maintain accurate flame detection and safe operation.
-
Keep airflow paths clear: Inspect vents and air passages monthly and remove dust, lint, or obstructions. This supports proper airflow and prevents overheating.
-
Examine the blower motor and fan: Clean the fan blades and check blower movement every few months. This ensures strong airflow and consistent heat distribution.
-
Inspect gas connections and fittings: Visually check connections for tightness and condition before and during the heating season. If any wear is seen, have it serviced immediately by a technician.
-
Schedule annual professional servicing: Book a qualified technician once a year before peak winter use. This ensures full system inspection, calibration, and safe long-term operation.
Find out how much it costs to install a water heater and what factors influence the total installation price.
Summary: Fix Williams Heater Problems Before They Escalate
Williams heater performance issues usually begin as small, easy-to-miss changes in startup behavior, flame stability, or response timing, making Williams heater troubleshooting an important step in early detection. Over time, these minor shifts can quietly reduce heating efficiency and lead to unexpected system shutdowns if not addressed early. Identifying irregular patterns in operation is the most effective way to prevent long-term damage and costly repairs.
Key Takeaways:
-
Small changes in ignition timing often signal an early system imbalance
-
Subtle airflow or flame variations can indicate developing internal strain
-
Many failures start as intermittent issues before becoming constant
-
Control response delays are often early signs of wiring or sensor drift
-
Ignoring early irregularities increases stress on multiple heater components
-
Timely inspection helps stabilize performance and prevent cascading faults
FAQs
What are the most common Williams heater parts that fail frequently?
The most common failing parts are the thermocouple, gas valve, and thermostat wiring system. These components control ignition, gas flow, and temperature regulation, making them most prone to issues.
Why does my Williams heater keep turning off unexpectedly?
This usually happens due to a weak thermocouple, gas flow interruption, or thermostat signal failure. The system shuts off as a safety response when proper operation cannot be maintained.
How can I tell if my Williams heater thermostat is faulty?
A faulty thermostat causes uneven heating, continuous running, or no response to settings. If temperature changes are not followed correctly, the thermostat or wiring may be defective.
What causes ignition problems in a Williams heater system?
Ignition issues are often caused by a dirty pilot assembly, failing thermocouple, or gas valve problems. These faults prevent proper flame detection or gas flow during startup.
When should I replace parts in my Williams heater instead of repairing them?
Replace parts when they show repeated failure, visible wear, or inconsistent performance after repair attempts. Key components like thermocouples, gas valves, and thermostats are usually replaced for long-term reliability.
| Disclaimer: The information provided in this article is intended for educational use only. Professional inspection is recommended before performing any repairs. |