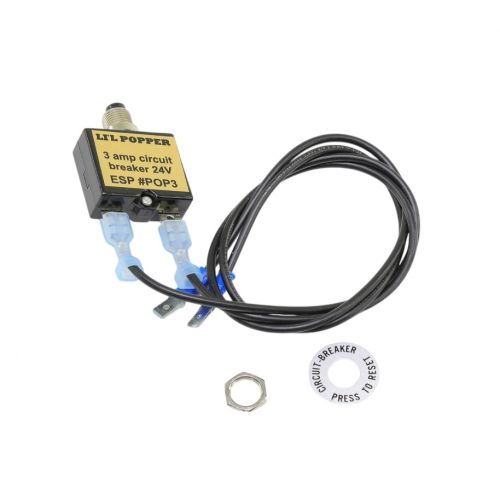
How to Replace a Circuit Breaker
Electrical systems are an integral part of our daily lives, powering everything from lights to appliances. However, over time, circuit breakers can wear out or become faulty, leading to potential hazards or disruptions in power supply. Understanding how to replace a circuit breaker is an essential skill for homeowners or anyone working with electrical systems. This comprehensive guide will provide you with step-by-step instructions on HVAC circuit breaker replacement safely and effectively. Whether you're a DIY enthusiast or simply want to ensure the smooth operation of your electrical system, mastering this process will empower you to maintain a safe and reliable electrical infrastructure.
Top selling products
So let us find out what is a circuit breaker & how it works!
What is a Circuit Breaker?
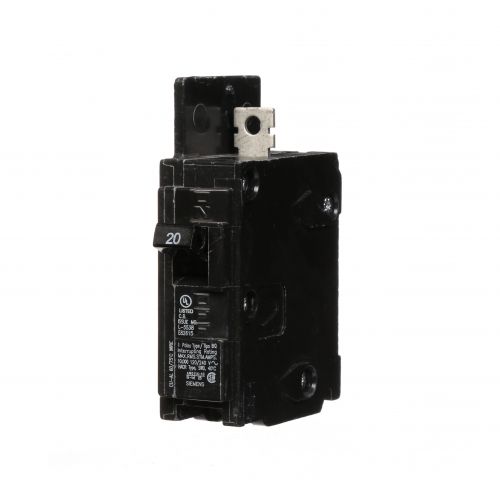
A circuit breaker is a device created to identify electrical issues, such as overloads or shorts, and stop the flow of current to avoid fires or harm to the electrical wiring in your home. These breakers are housed in a circuit breaker box and have become a modern alternative to traditional fuses. Unlike a fuse, where the internal wire burns out and cuts off the current, a circuit breaker simply turns off. Once the problem causing the overload or short is resolved, the circuit breaker can be turned back on to restore power. In contrast, a blown fuse would need to be replaced. Circuit breakers are typically found in electrical distribution systems, homes, commercial buildings, and industrial facilities.
Looking for top-quality HVAC circuit breakers from renowned brands like Amana, Goodman, Carrier, Lennox, and more? Look no further than PartsHnC to buy circuit breaker or any other HVAC parts and accessories! We offer a wide selection of circuit breakers, ensuring you find the perfect fit for your needs. Shop now for reliable and trusted products.
How Does a Circuit Breaker Work?
We know that circuit breaker acts as a safety device by interrupting the flow of electricity when a fault is detected. Then, how does a circuit breaker work? The basic principle behind a circuit breaker is simple. It consists of a switch mechanism and a tripping mechanism. Under normal conditions, the switch allows the current to flow through the circuit. However, if the current exceeds a certain predetermined limit or a short circuit occurs, the tripping mechanism is activated. The switch is opened quickly by the tripping mechanism, breaking the circuit and stopping the flow of electricity. This prevents further electrical system damage and lowers the possibility of a fire or other electrical hazards. The HVAC circuit breaker can be reset to turn the circuit back on once the issue has been fixed.
Read on to find out more about types of Circuit Breaker.
What Are the Types of Circuit Breakers?
Circuit breakers come in various types, each designed for specific applications and electrical systems. Here are some common circuit breaker types:
Miniature Circuit Breakers (MCBs): The most common type of circuit breakers in residential and commercial structures are MCBs. They come in a variety of current ratings and offer protection from overcurrent and short circuits. MCBs provide a practical way to manage and safeguard individual circuits and are small in size and simple to install.
Molded Case Circuit Breakers (MCCBs): Larger circuit breakers known as MCCBs are frequently used in industrial settings and larger structures. They provide dependable protection against overloads, short circuits, and ground faults and have higher current ratings than MCBs. MCCBs frequently come with extra features like programmable trip settings and arc fault protection.
Residual Current Circuit Breakers (RCCBs): The purpose of RCCBs, also referred to as GFCIs (ground fault circuit interrupters), is to guard against electrical shocks and ground faults. They continuously keep an eye on the circuit's live and neutral current balance. The RCCB quickly trips and cuts off the circuit if a fault or imbalance is found, shielding users from electric shocks. In places like bathrooms, kitchens, and outdoor installations where electrical equipment is exposed to moisture, RCCBs are frequently used.
Arc Fault Circuit Interrupters (AFCIs): Arc faults are electrical discharges that can start fires, and AFCIs are specialised circuit breakers that offer protection against them. AFCIs keep an eye on the circuit for any unusual arcing conditions and cut the power right away if one is found. They are frequently installed in living rooms, bedrooms, and other spaces where faulty or damaged wiring could result in electrical fires.
Ground Fault Circuit Interrupters (GFCIs): The purpose of GFCIs is to guard against ground faults, which happen when an electrical current leaks to the ground instead of taking the intended route. Electrical shocks are avoided thanks to GFCIs, which continuously check the electrical current passing through a circuit and trip the breaker if an imbalance is found. They are frequently used in locations where electrical hazards are a high risk, such as bathrooms, kitchens, outdoor outlets, and close to water sources.
Supplementary Protectors: Mini circuit breakers (MCBs), also referred to as supplementary circuit breakers or supplementary protectors, are intended to offer additional security for particular circuits or devices. To safeguard delicate machinery or circuits that need lower current ratings, they are frequently used in tandem with primary circuit breakers.
Find out the Top HVAC Brands for your HVAC systems parts and accessories.
Gathering Necessary Tools and Materials
When it comes to circuit breaker replacement, having the right tools and materials on hand is crucial. Here are the essential items you'll need for the task:
- Screwdriver: A flathead or Phillips screwdriver, depending on the type of screws used to secure the breaker panel cover.
- Voltage Tester: This tool helps you ensure that the power to the HVAC circuit breaker has been turned off before you start working.
- Replacement Circuit Breaker: Make sure to purchase a breaker that is compatible with your electrical panel and meets the necessary specifications.
- Safety Glasses and Gloves: Protect your eyes and hands from any potential hazards while working with electrical components.
- Flashlight: A reliable light source will help you see clearly inside the breaker panel.
- Wire Strippers: These tools are handy for removing insulation from wires, if necessary.
How to Remove a Circuit Breaker?
Circuit breakers play a crucial role in protecting electrical circuits from overloads and short circuits. However, there may be instances where you need to remove a circuit breaker, whether it's for maintenance, replacement, or upgrading your electrical system. Then how to remove a circuit breaker? Removing a circuit breaker requires caution and adherence to safety guidelines to prevent any accidents or damage.
Here's a step-by-step guide on how to remove a circuit breaker safely:
Turn off the power supply: Turn off the power supply to the circuit breaker you want to remove.
Identify the circuit breaker: Once you have deactivated the power, identify the circuit breaker you wish to remove. Each circuit breaker is typically labeled, indicating which part of your electrical system it controls. Make sure you correctly identify the circuit breaker to avoid removing the wrong one.
Test for power: Use the voltage tester to check if there is any electricity flowing through the circuit breaker. This step is essential to ensure your safety. Place the voltage tester on the breaker's terminals and verify that there is no voltage present. If the tester indicates voltage, double-check that you have turned off the correct breaker or main switch.
Remove the circuit breaker cover: Most circuit breakers have a cover or panel that needs to be removed before accessing the breaker itself. Use the appropriate screwdriver to unscrew the screws securing the cover in place. Set the cover aside in a safe location.
Loosen the terminal screws: Once the cover is removed, you'll see the circuit breaker terminals. Using the appropriate screwdriver, carefully loosen the terminal screws holding the circuit breaker in place. Take note of the wires connected to the breaker and their respective positions.
Disconnect the wires: With the terminal screws loosened, gently pull out the wires connected to the circuit breaker. It's important to exercise caution during this step and avoid pulling or tugging excessively, as it can damage the wires or the breaker itself. If the wires are tightly connected, you may need to use pliers to help loosen them.
Remove the circuit breaker: Once the wires are disconnected, you can now remove the circuit breaker from its position in the electrical panel. Grasp the breaker firmly and carefully slide it out of the panel, ensuring you don't damage any surrounding components or wiring.
Inspect the circuit breaker: After removal, take a moment to inspect the circuit breaker for any signs of damage or wear. If the breaker is faulty or shows signs of malfunction, it's recommended to replace it with a new one. Consult a qualified electrician if you're unsure about the condition of the breaker.
Know about the HVAC Glossary and terms.
How to Install a Circuit Breaker?
Installing a circuit breaker is an essential step in ensuring the safety and functionality of your electrical system. Here's a step-by-step process on how to install a circuit breaker:
Choose the Right Circuit Breaker: Determine the appropriate size and type of circuit breaker for the electrical load it will be protecting. Refer to the electrical panel's specifications and consult an electrician if you're unsure.
Turn off the Power: Locate the main electrical panel in your home or building before installing circuit breaker. Flip the main circuit breaker switch to the "off" position. This will cut off power to the entire panel.
Remove the Panel Cover: Unscrew the panel cover using a screwdriver. Set it aside in a safe place.
Identify the Breaker Location: Determine the location where you want to install the new circuit breaker. Make sure it corresponds to the appropriate slot in the panel. Double-check that the slot is vacant and suitable for the breaker size.
Prepare the Wires: Using wire cutters, strip about 1/2 inch of insulation from the end of the wire that will connect to the circuit breaker. Ensure the exposed wire is clean and free from any frayed ends.
Circuit breaker installation: Position the circuit breaker on the designated slot. Firmly press it into place until it snaps onto the buss bar. Make sure it is securely seated.
Connect the Wires: Insert the stripped end of the wire into the terminal or lug on the circuit breaker. Tighten the screw to secure the connection. Repeat this process for each wire you need to connect.
Double-Check Connections: Once all the wires are connected, inspect each connection to ensure they are tight and properly secured. Loose connections can lead to electrical problems and overheating.
Replace the Panel Cover: Place the panel cover back onto the electrical panel. Tighten the screws to secure it in place.
Restore Power: Return to the main circuit breaker and flip the switch to the "on" position. This will restore power to the panel. Test the circuit breaker by turning on the connected electrical devices and checking for proper functionality.
How to Test a Circuit Breaker?
To ensure that a circuit breaker is functioning properly, it is important to test it regularly. Here are some steps that help you to find out how to test a circuit breaker:
- Safety First: Before you begin testing a circuit breaker, always prioritize safety. Turn off the power supply to the circuit you'll be working on. Use a voltage tester to confirm that the circuit is de-energized and no electricity is flowing.
- Visual Inspection: Start by visually inspecting the circuit breaker for any signs of damage, such as burnt wires, discoloration, or a tripped lever. If you notice any visible issues, do not proceed with testing and consult a qualified electrician.
- Reset the Breaker: If the circuit breaker is in the tripped position, reset it by firmly pushing the lever to the "off" position and then to the "on" position. This step helps determine if the tripping was due to an overload or a short circuit.
- Load Test: To perform a load test, you need a multimeter capable of measuring voltage and current. Set the multimeter to the appropriate range and connect the leads in parallel to the circuit breaker terminals.
Voltage Test: With the circuit breaker in the "on" position, measure the voltage across the breaker terminals. It should match the specified voltage for your electrical system. Any significant deviation may indicate a problem with the breaker.
Current Test: Turn off the circuit breaker and disconnect the load. Connect the multimeter in series with the circuit (inserted between the load and the breaker) to measure the current. Gradually increase the load, keeping an eye on the current reading. The current should not exceed the breaker's rated capacity. If it does, the breaker may be faulty. - Tripping Test: This test helps ensure that the circuit breaker trips correctly when faced with excessive current. Reconnect the load and gradually increase the current until it exceeds the breaker's rated capacity. The breaker should trip and cut off the circuit, preventing any further flow of electricity. If the breaker fails to trip or trips prematurely, it should be replaced.
- Regular Maintenance: It's recommended to perform routine circuit breaker maintenance to keep them in optimal condition. This includes cleaning the breaker, tightening any loose connections, and verifying the breaker's label information for accuracy.
Know more about How to replace your furnace blower motor.
How Much Does It Cost to Replace a Circuit Breaker?
The circuit breaker replacement cost depends on the size of the breaker. For smaller residential circuit breakers, such as 15-20 amp or 30-40 amp breakers, the average cost ranges from $75 to $150. Larger circuit breakers, such as 100-200 amp or 200-400 amp breakers, can cost between $200 and $500. Circuit breakers above 400 amps may cost $500 or more.
Here is the table that shows how much does it cost of circuit breaker replacement
| Circuit Breaker Size | Average Cost |
| 15-20 Amp | $75 - $125 |
| 30-40 Amp | $100 - $150 |
| 50-60 Amp | $125 - $175 |
| 70-100 Amp | $150 - $200 |
| 100-200 Amp | $200 - $300 |
| 200-400 Amp | $300 - $500 |
| Above 400 Amp | $500+ |
It's important to note that these are average costs and prices may vary based on factors such as the brand of the circuit breaker, the complexity of the circuit breaker installation, and the location. Replacing a circuit breaker requires careful attention to safety guidelines and a thorough understanding of the process. Throughout this guide, we have highlighted the key steps involved in replacing a circuit breaker. Safety should always be the top priority, and it is essential to follow safety precautions such as wearing protective gear and ensuring proper insulation.
FAQ’s
Can I replace a circuit breaker myself?
Yes, you can replace a circuit breaker yourself if you have the necessary knowledge, skills, and tools. However, it is recommended to consult a licensed electrician for safety circuit breaker repair and to ensure the proper installation of the new breaker.
How do I know if my circuit breaker is bad?
If your circuit breaker is frequently tripping, making buzzing or crackling noises, feels hot to the touch, or shows signs of physical damage, it may be a sign of a faulty breaker.
Why does my 15 amp breaker keep tripping?
A 15 amp breaker may trip repeatedly due to overloaded circuits, a short circuit, or a ground fault. Overloading occurs when the total electrical load exceeds the breaker's capacity, while short circuits and ground faults are caused by faulty wiring or electrical equipment.
What is the life expectancy of a circuit breaker?
The life expectancy of a circuit breaker varies depending on factors such as usage, environmental conditions, and the quality of the breaker. On average, circuit breakers can last for about 30 to 40 years.
How many times can a breaker trip before it needs to be replaced?
There is no specific number of trips that determines when a breaker needs replacement. Breakers are designed to handle multiple trips caused by temporary overloads or minor faults.
How do I go about changing a circuit breaker in my HVAC system?
Changing a circuit breaker in your HVAC system involves turning off power, removing the old breaker, and installing a new one, ensuring compatibility.
How to repair circuit breaker?
To repair a circuit breaker related to HVAC, consult a professional electrician to diagnose and fix the issue safely.
Can you guide me on replacing a 15 amp breaker in my HVAC setup?
Replacing a 15 amp breaker in your HVAC system requires selecting a suitable replacement and following proper electrical procedures.
What's the average cost associated with replacing electrical circuit breakers in a house HVAC system?
The average cost to replace circuit breakers in a house HVAC system varies but can range from $200 to $800 per breaker.
How should I approach a house circuit breaker replacement for my HVAC unit?
House circuit breaker replacement for your HVAC unit should be performed by a licensed electrician for safety and compliance.
 Loyalty Program

