Honeywell Humidifier Troubleshooting Guide: 10 Common Problems and Proven Fixes
Honeywell humidifiers are designed to keep your indoor air balanced and comfortable, but like any appliance, they can run into issues over time. From weak mist output to strange noises or units that won’t turn on, even minor problems can impact performance and comfort levels in your home. The good news is that most of these issues are easy to solve by checking the right Honeywell humidifier parts.
In this troubleshooting guide, we’ll walk you through the 10 most common Honeywell humidifier problems and the proven fixes that work for each one — whether you're using portable models like the HE120 or larger setups using whole‑house humidifier parts, all the way to premium units that might require specific Enviracaire Elite humidifier parts for replacement or repair.
Understanding Your Honeywell Humidifier: Key Components & How It Works
Honeywell humidifiers help keep indoor air at the perfect humidity by efficiently adding moisture. Knowing the different Honeywell humidifier parts and how each works makes it easier to identify and resolve issues quickly.
-
Water Tank/Reservoir: Holds the water used by the humidifier. The tank supplies water steadily, ensuring a constant flow of moisture into the air.
-
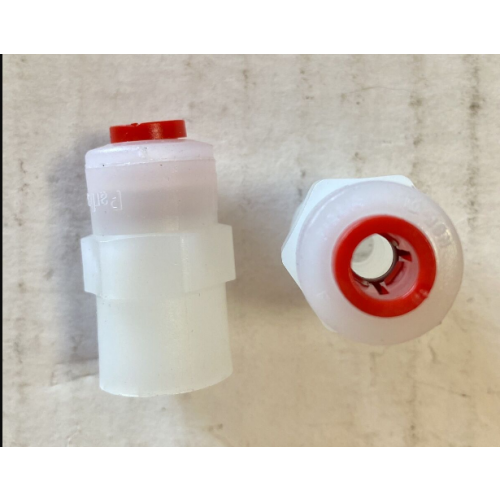
Float Valve: Keeps the water level in the tank properly balanced. It prevents overflow by stopping water flow when the tank is full.
-
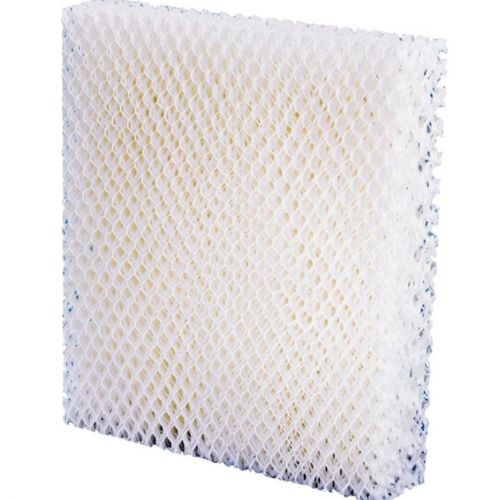
Evaporative Wick / Filter: Absorbs water from the tank and allows it to evaporate. As air moves through the wick, it absorbs moisture and distributes it evenly across the room.
-
Fan / Blower: Pulls air through the wick to distribute humidity. It ensures the room receives a steady, consistent flow of moist air.
-
Humidistat / Sensor: Detects the current room humidity. It notifies the humidifier to activate or shut off to keep the room’s humidity at the set level.
-
Water Pump (in some models): Circulates water over the wick evenly. This ensures consistent evaporation and prevents dry spots on the wick.
-
Mist Nozzle / Outlet: Directs the humidified air into the room. It controls the airflow and moisture distribution effectively.
-
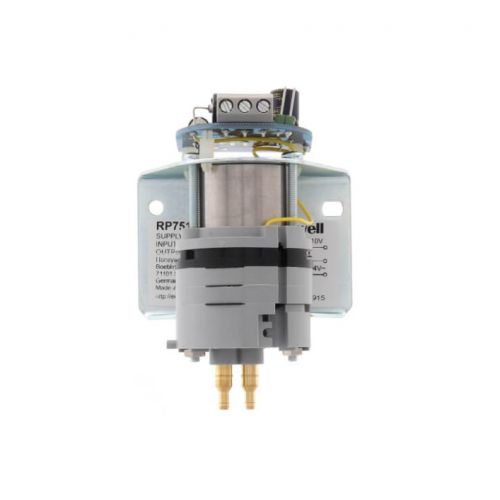
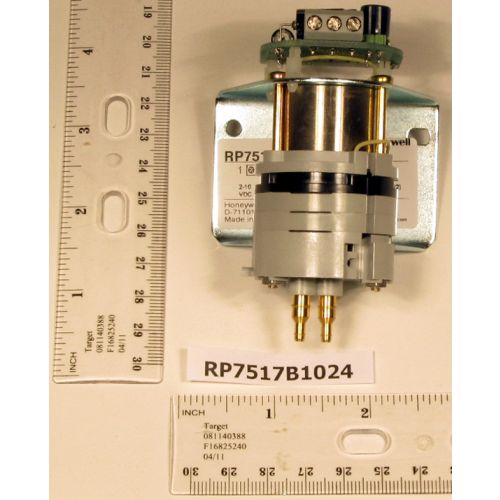
Power Supply / Circuit Board: Powers and controls all the humidifier’s functions. It manages the fan, pump, sensors, and safety features efficiently.
-
Filter Tray / Base: Holds the wick securely in place. It ensures proper airflow through the wick for optimal humidification.
Looking to keep your Honeywell humidifier running like new? At PartsHnC, we offer high-quality Honeywell humidifier parts to restore performance. Key replacements include blower motors, circuit boards, control boards, and more for smooth airflow and consistent operation..
10 Common Honeywell Humidifier Problems and How to Fix Them
Common Honeywell humidifier troubleshooting issues can disrupt your home’s comfort, but knowing how to fix a Honeywell humidifier makes resolving them simple and efficient.
1. Honeywell Humidifier Not Turning On
The humidifier does not turn on even when it is properly plugged in.
Possible Causes: Misaligned tank, internal safety switch engaged, or faulty power components.
Fixes: Ensure the water tank is seated correctly to trigger the safety switch. Test the humidifier in another outlet to eliminate socket problems, and check the power cord and plug for any signs of damage. Reset the unit if it has a built-in safety or power reset function.
2. Honeywell Humidifier No Mist
Only a small amount of mist, or none at all, is emitted.
Possible Causes: Hard water scale buildup, saturated or worn wick, or blocked airflow.
Fixes: Clean or replace the wick/filter regularly. Remove any mineral buildup using a vinegar solution. Ensure air intake and exhaust are unobstructed. Check the fan and humidistat settings for proper operation.
3. Humidifier Makes Clicking or Popping Noise
The unit emits unusual repetitive sounds during operation.
Possible Causes: Loose internal parts, fan imbalance, or debris in the motor.
Fixes: Tighten all screws and internal parts. Remove and clean the fan blades to balance rotation. Inspect for lodged debris or mineral deposits inside the motor area. Reinstall the wick/filter securely to avoid rattling.
4. Honeywell Humidifier Leaking
Moisture appears outside the tank or around the base.
Possible Causes: Cracked tank, worn gasket seals, or uneven placement on surfaces.
Fixes: Immediately replace any cracked tanks or worn gaskets, and make sure the humidifier is positioned on a level, stable surface. Avoid overfilling and check float valve alignment. Dry any spilled water before restarting the unit.
5. Foul or Musty Smell
The humidifier emits bad odors even with clean water.
Possible Causes: Microbial growth in hidden corners, stagnant water, or neglected filters.
Fixes: Disassemble and clean hidden nooks with a mild vinegar solution. Replace the wick/filter if odor persists. Empty the water tank daily if the unit is unused for hours. Use distilled water to reduce bacterial buildup.
6. Unit Shuts Off Unexpectedly
The humidifier stops running mid-cycle.
Possible Causes: Overheating, sensor misreading, or inconsistent power supply.
Fixes: Allow the unit to cool and clean the ventilation grills. Check the humidistat sensor for dust or obstruction. Connect the unit to a reliable power source to avoid voltage fluctuations. Verify the tank is seated properly to avoid triggering the safety switch.
7. Excessive Humidity or Condensation
Room surfaces appear damp or foggy.
Possible Causes: Unit running too long, high humidity settings, or poor room ventilation.
Fixes: Reduce the humidity setting on the control panel. Run the humidifier intermittently instead of continuously. Open windows or use fans to improve airflow. Monitor with a hygrometer to maintain recommended levels (40–60%).
8. Solenoid Valve Cycling / Water Flow Issues
Solenoid opens and closes repeatedly, causing intermittent mist.
Possible Causes: Faulty valve, inconsistent water pressure, or sensor misread.
Fixes: Clean or replace the solenoid valve. Verify proper water pressure. Check the control wiring and humidistat settings.
Implication: Leads to low humidity output and increased component wear.
9. White Dust or Mineral Buildup
Fine white particles settle on furniture near the unit.
Possible Causes: Hard water usage or unmaintained filters.
Fixes: Switch to distilled or demineralized water. Clean the tank and base regularly to remove mineral deposits. Wipe nearby surfaces to prevent dust accumulation. Replace or clean the wick/filter as needed.
10. Display or Control Malfunctions
Digital panel or buttons stop responding.
Possible Causes: Moisture ingress, electrical surges, or sensor issues.
Fixes: Unplug the unit and let it dry completely. Wipe the control panel and buttons to remove moisture. Reset the humidifier according to the manual. Contact Honeywell support if the issue persists or the circuit board is damaged.
When to Replace Filters, Wicks & Other Essential Parts on Honeywell Humidifier
Replacing essential parts on time with genuine Honeywell humidifier replacement parts keeps your unit efficient and long-lasting.
|
Part |
Recommended Replacement Timeline |
When to Replace Sooner |
|
Wicks / Filters |
Every 1–3 months |
Hard-water buildup, reduced moisture output, odor, and discoloration |
|
Water Tank |
As needed |
Cracks, leaks, discoloration, weakened plastic |
|
Fan / Blower |
Every 2–5 years (depending on usage) |
Noisy operation, weak airflow, failure to turn on |
|
Gaskets / Float Valves |
Every 1–2 years |
Warping, leaks, improper water level detection |
|
Mist Nozzles / Outlets |
Every 6–12 months |
Blockages, uneven mist flow, mineral deposits |
Explore how to install a furnace humidifier, step-by-step, for improved comfort and healthier indoor air.
Honeywell Humidifier Cleaning & Maintenance Checklist
Proper Honeywell humidifier cleaning is essential to keep your unit running efficiently and maintain healthy indoor air. Following regular humidifier maintenance tips helps prevent mold, bacteria, and mineral buildup.
Daily:
-
Empty and rinse the water tank completely; stagnant water encourages bacterial growth.
-
Use a microfiber cloth to clean the tank and exterior, removing dust and debris that could mix into the mist.
-
Check water quality; replace filter as per Honeywell humidifier filter replacement guidelines.
-
Tilt and swirl the tank slightly while rinsing to clean hard-to-reach corners.
Weekly:
-
Thoroughly clean the tank, base, and nozzle using a 1:1 vinegar and water mixture to remove mineral buildup.
-
Remove and inspect the wick/filter for mold, dark spots, or clogging; soak lightly if needed.
-
Clean the airflow vents and fan blades to ensure consistent mist output.
-
Dry hidden areas inside the fan housing to prevent moisture buildup.
Monthly:
-
Inspect the float valve and gaskets for cracking, stiffness, or warping.
-
Remove and clean small hidden components, like the filter tray and nozzle assembly.
-
Run a short vinegar rinse cycle in the tank if supported by your model.
-
Lubricate moving parts lightly if recommended in the manual.
End-of-Season / Storage:
-
Drain and rinse the tank thoroughly, ensuring no water remains in the base or tray.
-
Disassemble vents, fans, and filters for deep cleaning.
-
Air-dry all components completely to prevent mold growth during storage.
-
Keep the humidifier in a cool, dry place and cover it with a breathable cloth to shield it from dust and moisture.
Regular Honeywell humidifier maintenance ensures smooth operation and helps your unit last longer.
How to Prevent Honeywell Humidifier Breakdowns
Proper care helps extend your Honeywell humidifier’s life and prevents common whole-house humidifier parts issues.
-
Use Distilled or Demineralized Water: Hard tap water leads to scale buildup that can silently damage wicks, fans, and nozzles over time.
-
Rotate or Flip the Wick/Filter: Rotating the wick occasionally ensures even wear and prevents dry spots that reduce efficiency, especially for Honeywell HE120 humidifier parts.
-
Clean Hidden Fan Areas: Dust and mineral deposits often accumulate behind fan blades or inside housings, causing noise or motor strain.
-
Check Float Valve Alignment: Even slight misalignment can trigger leaks or premature shutdowns; inspect monthly.
-
Avoid Overuse in Small Rooms: Running the unit continuously in a small space can overwork the motor and shorten its lifespan.
-
Inspect Electrical Contacts: Moisture or mineral deposits on internal contacts can cause erratic performance; wipe them carefully if accessible.
-
Keep Nozzle and Mist Outlet Free of Blockages: Tiny clogs may not be visible but can reduce airflow, force the fan to work harder, and wear components faster.
-
Seasonal Pre-Check: Before long-term storage or seasonal use, check all moving parts, seals, and filters to prevent hidden issues when restarting, including any Honeywell Enviracaire Elite humidifier parts.
Check out the furnace humidifiers: how to clean and maintain, keeping your system efficient and your indoor air fresh.
DIY Honeywell Humidifier Fixes vs Professional Repair
Understanding which issues you can safely fix at home versus when to call a professional can save time, money, and prevent damage. Proper care ensures your humidifier runs efficiently and lasts longer.
|
DIY Fixes |
Professional Repair |
|
Clean hidden corners of the tank, fan, and vents. |
Circuit board or sensor failures. |
|
Rotate or flip the wick to prevent uneven wear. |
Persistent leaks from cracks or warped gaskets. |
|
Tighten loose screws in the base or fan assembly. |
Motor or fan malfunctions cause noise or airflow issues. |
|
Check float valve alignment to avoid leaks. |
Repairs that could void the warranty if DIY is attempted. |
|
Use distilled water to prevent white dust and protect the filter. |
Calibration or sensor errors are not fixable manually. |
Wrap-Up: Ensure Your Honeywell Humidifier Runs Smoothly Year-Round
A well-functioning Honeywell humidifier ensures consistent humidity, better air quality, and comfortable living spaces throughout the year. Understanding and knowing what to do when your Honeywell humidifier is not working empowers you to act quickly and prevent further issues.
Unique Key Takeaways:
-
Minor issues like clogged nozzles, loose screws, or uneven wick wear can be safely handled at home.
-
Certified technicians should handle electrical, motor, or sensor issues to prevent further damage.
-
Recognizing unusual noises, leaks, or irregular mist output early prevents larger disruptions.
-
Distinguishing between DIY and professional repairs saves time, money, and avoids warranty voids.
By understanding your humidifier’s components, troubleshooting effectively to tackle Honeywell humidifier problems, and knowing when to seek help, you can enjoy smooth, reliable performance and a comfortable indoor environment all year round.
FAQs
Why did my Honeywell humidifier stop working?
Your humidifier may have stopped due to a clogged wick, empty water tank, or electrical issue. Check these common problems first before considering repairs.
How do you reset a Honeywell humidifier?
Turn off and unplug the unit, then remove and reseat the water tank. Some models also have a reset button—press it to restore normal operation.
Why is my humidifier on but not working?
The unit may be powered but blocked by a clogged wick, dirty filter, or mineral buildup. Inspect and clean components to restore mist output.
How to check if a Honeywell humidifier is working?
Listen for the fan running and observe mist production from the nozzle. You can also monitor the room’s humidity level to ensure it’s increasing.