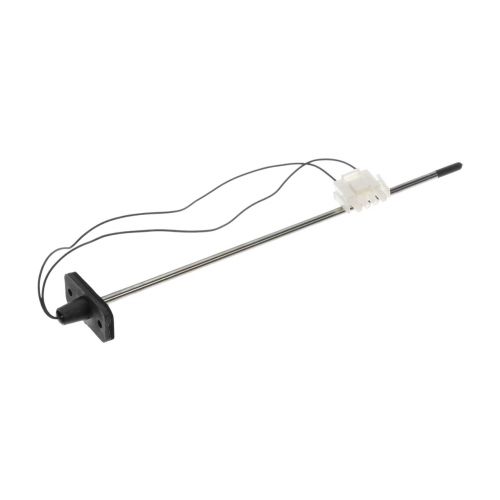
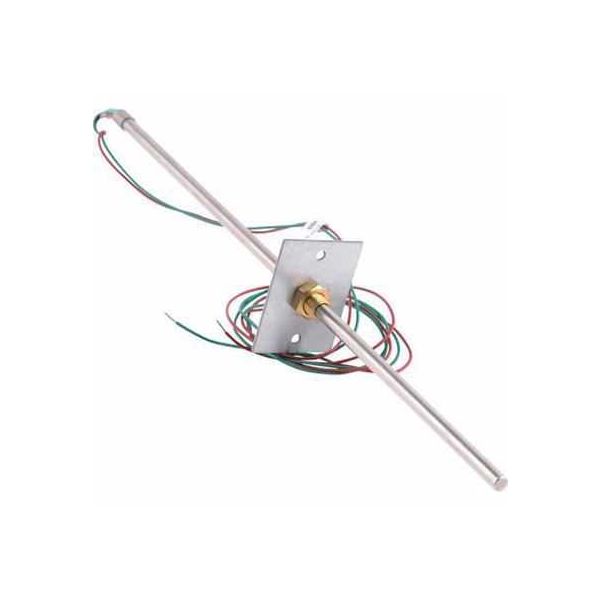
Lennox 88K38 Discharge Air Sensor
Specifications
- Length: 0.9 Inch
- Width: 13.5 Inch
- Height: 0.9 Inch
- Weight: 0.52lbs
- Measure: Unit
- Mounting Type: Flange Mount.
Loyalty Program| Manufacturer Name: Lennox Product Number: 88K38 OEM Part Number: 88K38 Product Description: The Lennox 88K38 Discharge Air Temperature Sensor is a critical component used in HVAC system, this sensor is designed to measure and monitor the temperature of the air as it exits the HVAC system, commonly referred to as "discharge air temperature." The primary function of this sensor is to accurately sense and measure the temperature of the air leaving the HVAC system, and also to measure the temperature of the air that is being supplied into the conditioned space by the HVAC system. They provide real-time data, allowing the HVAC system to make immediate adjustments to maintain the desired temperature. The temperature data gathered by the sensor is sent to the HVAC system's control board or thermostat, where it is used to regulate the system's heating or cooling processes. If the air temperature deviates from the desired setpoint, the HVAC system can adjust the operation of the heating or cooling elements to maintain optimal comfort. By accurately measuring the discharge air temperature, this sensor contributes to the overall energy efficiency of the HVAC system. It helps prevent the system from overcooling or overheating. The Discharge Air Temperature Sensor ensures that the air supplied to the conditioned space is at the desired temperature. Weight:0.52lbs/235.87g |
Same Day Shipping
Best Quality And Best Price
Wide Range of Inventory
Best Customer Service
Step1: Turn off power to the HVAC system to prevent electrical shock.
Step2: Locate and remove the existing discharge air sensor from the duct or coil.
Step3: Disconnect wiring and note positions or take a photo for reference.
Step4: Clean the sensor mounting area to ensure proper contact.
Step5: Install the sensor in the same orientation and secure it in place.
Step6: Reconnect wiring according to the original configuration.
Step7: Restore power and test the system to ensure accurate temperature readings.