Facebook Pixel

Copeland 998-0060-09 Coil Holding Kit

Special Price $151.36 Regular Price $174.06
In stock
SKU
998-0060-09
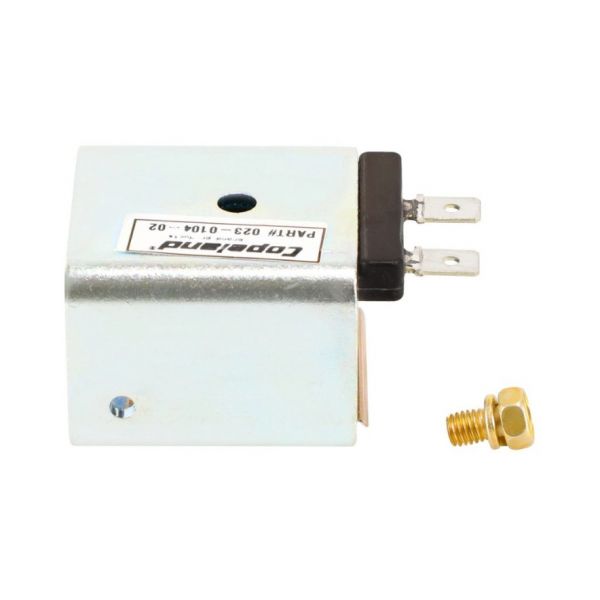
The Copeland 998-0060-09 Coil Holding Kit is a crucial part of any HVAC system to run smoothly. This coil holding kit made of strong material includes galvanized steel that make it withstand the test of time. This machine is made for working between 200 to 240 volts so as to have control over solenoid valves in refrigeration and cooling systems. The principal aim of this coil is to keep either open or closed conductivity of the solenoid valve which regulates the flow of refrigerants and other fluids. Moreover, temperature constancy is maintained by the holding coil whose exact adjustments increase overall efficiency and dependability of the system.
Manufacturer:
https://www.partshnc.com/media/catalog/product/9/9/998-0060-09.jpg

Specifications

  • Type: Coil Holding Kit
  • Material: Stainless Steel/Galvanized Steel
  • Voltage: 200-240V
  • Weight: 0.44lbs
Manufacturer Name: Copeland
Product Number: 998-0060-09
OEM Part Number: 998-0060-09
Product Description: Kit-Holding Coil
Weight:0.44lbs/199.58g

Choose the best HVAC equipment parts and supplies from PartsHnC!

  • Same Day Shipping

  • Best Quality And Best Price

  • Wide Range of Inventory

  • Best Customer Service

Have More Questions or Need Help to Place The Order?
Reach us at (866)773-0907 or [email protected]

Write Your Own Review
You're reviewing:Copeland 998-0060-09 Coil Holding Kit
Your Rating
Customer Questions
What maintenance is required for the Copeland 998-0060-09 Coil Holding Kit?

Inspect the coil holding kit regularly for wear, corrosion, or loose fasteners. Ensure all mounting points remain tight and properly aligned during service. Clean debris buildup to maintain stability and prevent operational pressure on the coil assembly.

What are common issues with the Copeland 998-0060-09 Coil Holding Kit?

  • Loose mounting brackets causing instability.
  • Misalignment during installation.
  • Corrosion or rust on metal components.
  • Wear leading to reduced coil support integrity.
  • Vibration-related loosening under operation.

Installation Steps

Step 1: Disconnect electrical power and lock out system before servicing compressor.

Step 2: Remove existing old coil assembly and inspect mounting surface for damage or debris.

Step 3: Position new coil onto solenoid or valve body, ensuring proper alignment.

Step 4: Secure coil firmly and connect electrical terminals per wiring diagram.

Step 5: Restore power and check coil energizes and holds valve position correctly.

Step 6: Check operation under load and confirm stable refrigeration cycle performance.