Facebook Pixel

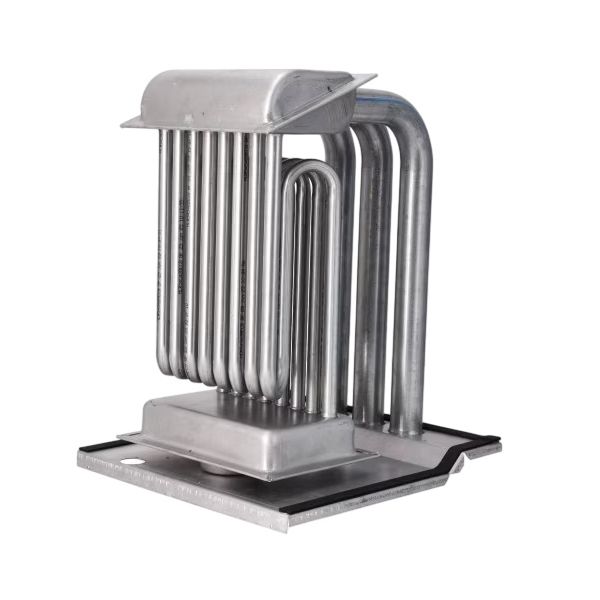
Rheem-Ruud AS-100560-01 Heat Exchanger

Special Price $221.51 Regular Price $245.88
In stock
SKU
AS-100560-01
The Rheem-Ruud AS-100560-01 Heat Exchanger is an HVAC equipment that is designed to transfer heat from one fluid to another. The heat exchanger is compact in dimension, and though it has a robust structure, the heat exchanger is made of steel. It functions by passing the hot fluid through the exchanger and in the process transferring on the other side of the walls of the exchanger. This process is used in controlling temperatures within HVAC systems thereby enhancing both heating and cooling.
Manufacturer:

https://www.partshnc.com/media/catalog/product/a/s/as-100560-01.jpg

Specifications

  • Length: 1/2"
  • Width: 2.1"
  • Height: 12.3"
  • Material: Steel
  • Weight: 23.48 Lbs
Manufacturer Name: Rheem-Ruud
Product Number: AS-100560-01
OEM Part Number: AS-100560-01
Product Description: Heat Exchanger
Weight:23.48lbs/10650.34g

Choose the best HVAC equipment parts and supplies from PartsHnC!

  • Same Day Shipping

  • Best Quality And Best Price

  • Wide Range of Inventory

  • Best Customer Service

Have More Questions or Need Help to Place The Order?
Reach us at (866)773-0907 or [email protected]

Write Your Own Review
You're reviewing:Rheem-Ruud AS-100560-01 Heat Exchanger
Your Rating
Customer Questions
What maintenance is required for the Rheem-Ruud AS-100560-01 Heat Exchanger?

Regularly inspect the heat exchanger for corrosion, scale buildup, or leaks. Flush the system periodically to remove sediment. Ensure connections are tight and insulated. Proper maintenance prevents inefficiency and potential operational hazards.

What are common issues with the Rheem-Ruud AS-100560-01 Heat Exchanger?

  • Scaling or mineral buildup reducing heat transfer.
  • Corrosion leading to leaks or cracks.
  • Uneven heating or reduced efficiency.
  • Noise or vibration from restricted flow.

Installation Steps

Step 1: Turn off power and water supply before beginning installation.

Step 2: Remove the old heat exchanger from the unit carefully.

Step 3: Inspect and clean surrounding components for debris.

Step 4: Position the new Heat Exchanger securely in place.

Step 5: Reconnect all water and gas lines, ensuring tight seals.

Step 6: Restore power and water supply, then test for leaks and proper operation.