Facebook Pixel

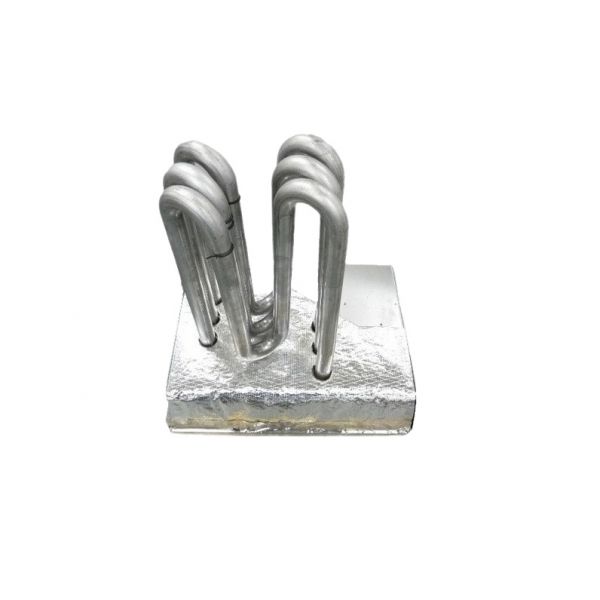
Trane EXC1362 Heat Exchanger

Special Price $1,252.05 Regular Price $1,389.78
In stock
SKU
EXC1362
The Trane EXC1362 is an essential part of gas furnaces air conditioning and heating systems; it is a heat exchanger. Well, you should try to think of it in a manner similar to a chunk of metal pipes through which heat is transferred between two fluids one can be a liquid and the other a gas, but they should never meet. It can be said that in a gas furnace the operation of heat exchanger is simply essential to the heating process. Flue products of combustion produced by the burner are channeled through one side of the heat exchange system.
Manufacturer:

https://www.partshnc.com/media/catalog/product/e/x/exc1362_1.jpg

Specifications

  • Length: 29"
  • Depth: 29"
  • Weight: 80lbs
  • Voltage: 200-230/460V
  • Type: Heat Exchanger
Manufacturer Name: Trane
Product Number: EXC1362
OEM Part Number: EXC1362
Product Description: Heat Exchanger
Weight:80lbs/36287.36g

Choose the best HVAC equipment parts and supplies from PartsHnC!

  • Same Day Shipping

  • Best Quality And Best Price

  • Wide Range of Inventory

  • Best Customer Service

Have More Questions or Need Help to Place The Order?
Reach us at (866)773-0907 or [email protected]

Write Your Own Review
You're reviewing:Trane EXC1362 Heat Exchanger
Your Rating
Customer Questions
What maintenance is required for the Trane EXC1362 Heat Exchanger?

Inspect the heat exchanger regularly for corrosion, soot buildup, and cracks. Keep surfaces clean and ensure proper airflow through the HVAC system. Check seals and connections for leaks. Always isolate power before maintenance.

What are common issues with the Trane EXC1362 Heat Exchanger?

  • Corrosion or cracking in exchanger tubes.
  • Soot or carbon buildup reducing efficiency.
  • Airflow restriction causing overheating or shutdown.
  • Heat transfer loss due to fouling.
  • Gasket or seal deterioration leading to leaks.

Installation Steps

Step 1: Turn off main power supply and isolate HVAC system completely.

Step 2: Remove old heat exchanger carefully, inspect ducting and mounting area for damage or corrosion.

Step 3: Position new heat exchanger securely and align inlet and outlet connections.

Step 4: Connect refrigerant or water lines, tighten fittings, ensure proper seals and insulation.

Step 5: Restore power, run system test, check for leaks, vibration, and performance stability.