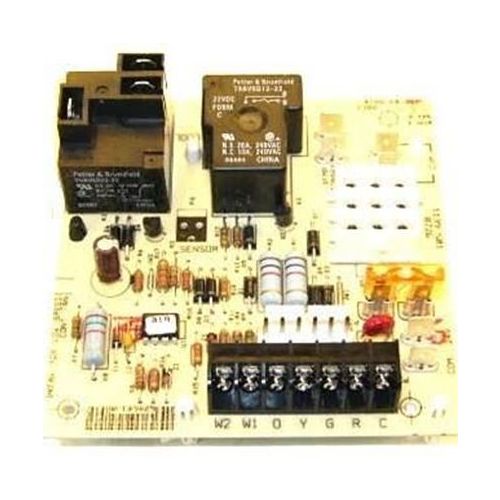
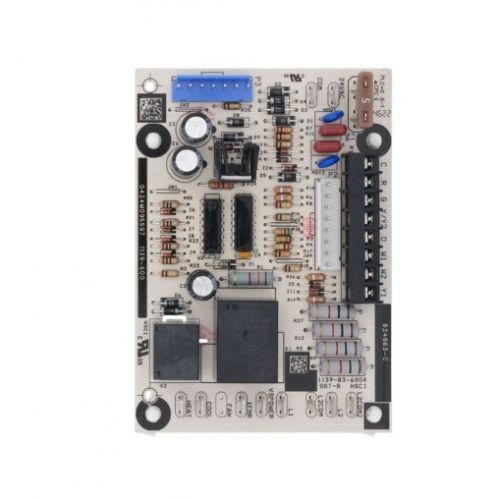
Nordyne 624625R Heat Pump Circuit Board
Specifications
- Type: Heat Pump Circuit Board
Loyalty Program| Manufacturer Name: Nordyne Product Number: 624625R OEM Part Number: 624625R Product Description: The Nordyne 624625R Circuit Board AC Heat Pump within an HVAC system is a critical component responsible for managing and controlling the operation of the heat pump. The circuit board serves as the central control unit for the heat pump, coordinating the operation of various components to provide both heating and cooling functions. It uses temperature sensors to monitor indoor and outdoor temperatures, ensuring that the heat pump responds appropriately to maintain the desired indoor temperature. The circuit board allows users to switch between heating and cooling modes, typically through a thermostat or control panel. It manages the flow of refrigerant within the heat pump system, directing it to the appropriate coil based on the selected mode. In colder climates, the circuit board initiates and manages the defrost cycle, this prevents the outdoor coil from icing up. It regulates the operation of the indoor and outdoor fans, adjusting fan speeds to optimize heating or cooling performance. It displays error codes or communicates issues through indicator lights making it easier for technicians to troubleshoot and repair. Nordyne 624625R Circuit Board AC The Heat Pump of an HVAC system is a vital component that controls and coordinates various functions to ensure efficient and reliable heating and cooling performance while providing user-friendly features and diagnostics for maintenance. Weight:0.65lbs/294.83g |
Same Day Shipping
Best Quality And Best Price
Wide Range of Inventory
Best Customer Service
Step1: Turn off power to the heat pump to prevent electrical shock.
Step2: Remove the access panel and disconnect all wiring from the existing circuit board.
Step3: Note wire positions or take a photo for reference.
Step4: Carefully remove the old circuit board from its mounting.
Step5: Install the circuit board, aligning mounting points securely.
Step6: Reconnect all wires according to the original configuration.
Step7: Replace the access panel, restore power, and test the heat pump to ensure proper operation.