Facebook Pixel

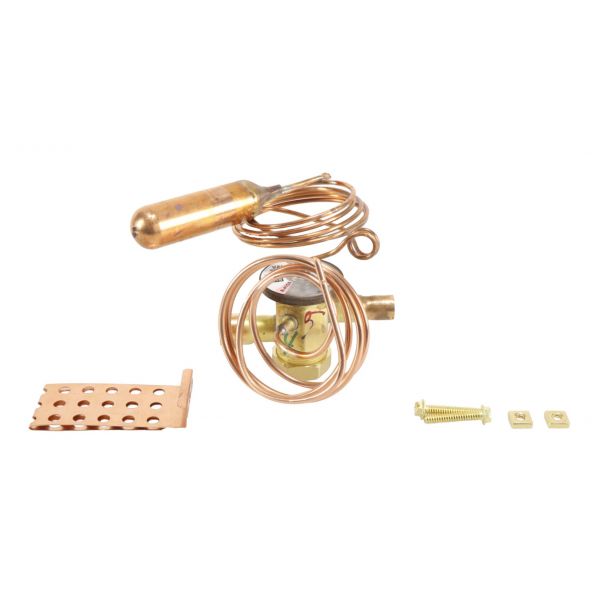
Trane VAL19629 3-Ton Thermal Expansion Valve(TXV) 3/8" IN x 1/2" Out

Special Price $171.32 Regular Price $197.02
In stock
SKU
VAL19629
Trane VAL19629 3-Ton Thermal Expansion Valve TXV is a critical component of HVAC systems that accurately regulates refrigerant. This 3-ton TXV, with a 3/8” inlet port and a 1/2” outlet port, works by measuring the temperature of the refrigerant leaving the evaporator and then regulating the amount of refrigerant to ensure the right amount of superheat. Such fine-tuning ensures optimum utilization of the system and hence conserves energy and lowers the overhead costs. The TXV has the positive impact on the increase of system reliability and the increase of equipment’s working life. Designed for use with air conditioners, heat pumps and chillers.
Manufacturer:

https://www.partshnc.com/media/catalog/product/v/a/val19629.jpg

Specifications

  • Type: Thermal Expansion Valve(TXV)
  • Capacity: 3-Ton
  • Inlet port: 3/8"
  • Outlet port: 1/2"
Write Your Own Review
You're reviewing:Trane VAL19629 3-Ton Thermal Expansion Valve(TXV) 3/8" IN x 1/2" Out
Your Rating
Customer Questions
What maintenance is required for the Trane VAL19629 Thermal Expansion Valve?

Regularly inspect the TXV for leaks, corrosion, or debris buildup. Ensure the sensing bulb is properly mounted and in better thermal contact with the evaporator. Clean surrounding components and verify refrigerant flow. Always depressurize the system before servicing.

What are common issues with the Trane VAL19629 Thermal Expansion Valve?

  • Improper refrigerant flow causing reduced cooling efficiency.
  • Valve sticking or failing to modulate properly.
  • Leaks at connection points.
  • Sensing bulb detachment or poor thermal contact.

Installation Steps

Step 1: Turn off power and recover refrigerant from the system to ensure safety.

Step 2: Remove the existing TXV carefully, noting inlet and outlet connections.

Step 3: Clean the line connections and valve seat area thoroughly.

Step 4: Install the new TXV in the correct orientation and secure fittings.

Step 5: Evacuate and recharge the system with refrigerant according to manufacturer specifications.

Step 6: Restore power and test the system for proper superheat and operation.