Facebook Pixel

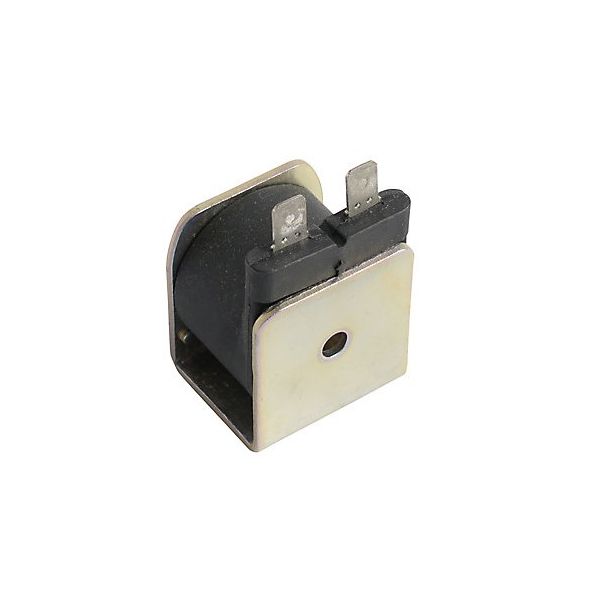
Lennox 42W18 Solenoid Coil 24V

Special Price $52.35 Regular Price $60.20
In stock
SKU
42W18
The Lennox 42W18 Solenoid Coil is an essential component to replace in your HVAC especially in heat pumps. It is a metal device whose working involves the adjustment of a reversing valve in order to direct refrigerant circulation. This valve reverses the flow of refrigerant allowing your heat pump to heat and cool your home. When energized the coil turns on the reversing valve to change the flow of the refrigerant for heating. the flow is in the opposite direction for cooling your solenoid coil checked or repaired If you want your heat pump system to function properly and flow the refrigerant as intended this is anessential part that plays a critical role during both the heating and cooling seasons.
https://www.partshnc.com/media/catalog/product/4/2/42W18_lennox_partshnc.jpg

Specifications

  • Voltage: 24V
  • Weight: 0.27lbs
  • Type: Solenoid Coil for Reversing Valve
  • Length: 4 Inch
  • Weight: 4 Inch
  • Height: 4 Inch
Manufacturer Name: Lennox
Product Number: 42W18
OEM Part Number: 42W18
Product Description: Solenoid Coil, 24V,
Weight:0.27lbs/122.47g

Choose the best HVAC equipment parts and supplies from PartsHnC!

  • Same Day Shipping

  • Best Quality And Best Price

  • Wide Range of Inventory

  • Best Customer Service

Have More Questions or Need Help to Place The Order?
Reach us at (866)773-0907 or [email protected]

Write Your Own Review
You're reviewing:Lennox 42W18 Solenoid Coil 24V
Your Rating
Customer Questions
What maintenance is required for the Lennox 42W18 Solenoid Coil?

Regularly inspect the coil for dust, corrosion, or loose connections. Ensure proper voltage supply and tight mounting. Test operation periodically to confirm accurate actuation. Proper maintenance prevents electrical faults and ensures consistent system performance.

What are common issues with the Lennox 42W18 Solenoid Coil?

  • Failure to actuate or respond.
  • Overheating of the coil.
  • Loose or corroded electrical connections.
  • Intermittent operation or buzzing noise.
  • Short circuits or insulation damage.

Installation Steps

Step1: Turn off power to the HVAC system and relieve pressure if applicable.

Step2: Remove the existing solenoid coil from the valve or actuator.

Step3: Clean the mounting area and inspect the valve stem for debris.

Step4: Slide the new solenoid coil into position over the valve stem and ecure it in place.

Step5: Restore power and test the system to ensure the coil actuates properly.