Facebook Pixel

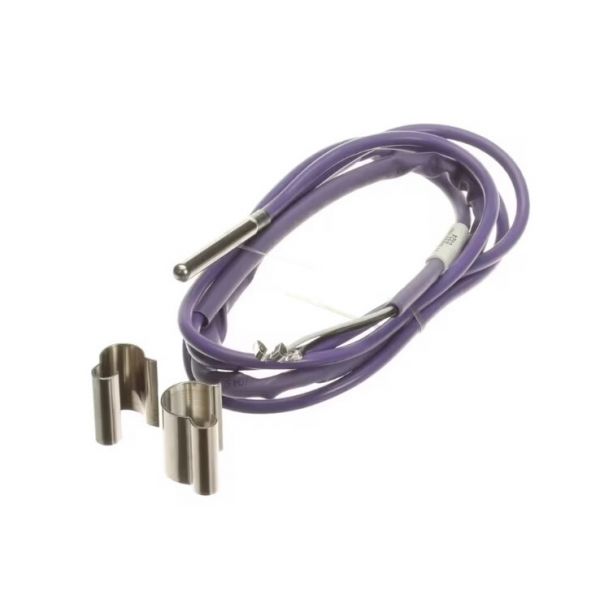
ClimateMaster S17S0031N01 Air Freezer Thermistor W/48" Cable

Special Price $25.79 Regular Price $37.95
In stock
SKU
S17S0031N01
The ClimateMaster S17S0031N01 Air Freeze Thermistor is a safety component that is used to measure air temperature in HVAC systems to avoid freezing conditions that harm the equipment. This thermistor has a 48” cable to give accurate temperature readings to support geothermal heat pump systems’ functionality. This is done by detecting low air temperatures and making the system respond to this by increasing its reliability and performance. This thermistor is most useful in domestic heating and cooling systems as it minimizes the chances of freeze-up and enhances energy use.
https://www.partshnc.com/media/catalog/product/s/1/s17s0031n01_1.jpg

Specifications

  • Type: Air Freeze Thermistor
  • Cable Length: 48"
Manufacturer Name: ClimateMaster
Product Number: S17S0031N01
OEM Part Number: S17S0031N01
Product Description: Airfreeze Thermister 48"Violet
Weight:0.09lbs/40.82g

Choose the best HVAC equipment parts and supplies from PartsHnC!

  • Same Day Shipping

  • Best Quality And Best Price

  • Wide Range of Inventory

  • Best Customer Service

Have More Questions or Need Help to Place The Order?
Reach us at (866)773-0907 or [email protected]

Write Your Own Review
You're reviewing:ClimateMaster S17S0031N01 Air Freezer Thermistor W/48" Cable
Your Rating
Customer Questions
What maintenance is required for the ClimateMaster S17S0031N01 Air Freezer Thermistor?

Regularly inspect the thermistor and cable for damage, corrosion, or loose connections. Ensure it is securely mounted and free from obstructions. Proper maintenance ensures accurate temperature readings and efficient system operation. Always disconnect power before handling for safety.

What are common issues with the ClimateMaster S17S0031N01 Air Freezer Thermistor?

  • Inaccurate temperature readings.
  • Open or shorted sensor wiring.
  • Loose or corroded connections.
  • Intermittent sensor signals.

Installation Steps

Step1: Turn off power to the system before starting.

Step2: Locate and remove the existing thermistor.

Step3: Disconnect the wiring carefully.

Step4: Install the new thermistor in the same position, routing the cable neatly.

Step5: Reconnect the wiring according to the manufacturer’s diagram.

Step6: Restore power and test the system to ensure accurate temperature sensing.