
Facebook Pixel

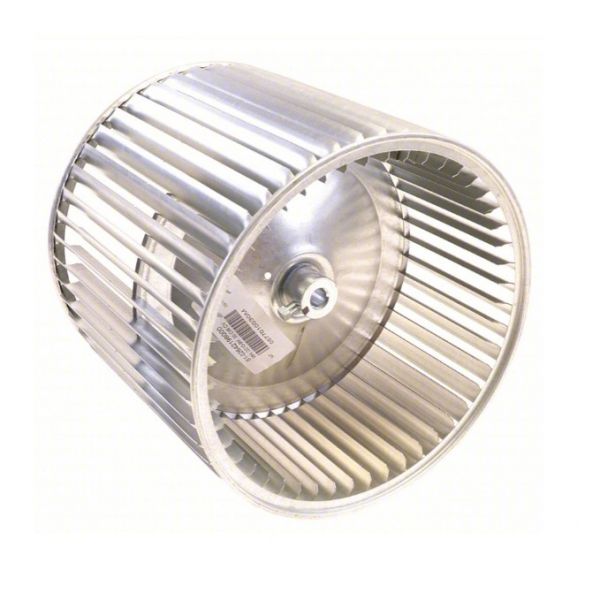
York S1-026-42198-000 Blower Wheel 10" X 9" CW 1/2" Bore

Special Price $150.82 Regular Price $173.44
Out of stock
SKU
S1-026-42198-000
The York S1-026-42198-000 Blower Wheel is a part that is used to enhance the airflow in HVAC systems. This blower wheel has a diameter of 10” and a breadth of 9” which is ideal for the right airflow and performance. It has a 1/2 inch bore and turns in a clockwise direction to suit most York heating and cooling systems. The blower wheel is strong enough to handle heavy airflow and the company has ensured that it produces a low noise level hence the silent blower. Better air dispersion helps to sustain constant temperature indoors and is beneficial for the overall system.
Manufacturer:

https://www.partshnc.com/media/catalog/product/s/1/s1-026-42198-000.jpg

Specifications

  • Type: Blower Wheel
  • Bore Size: 1/2"
  • Diameter: 10"
  • Width: 9"
  • Rotation: Clockwise
Manufacturer Name: York
Product Number: S1-026-42198-000
OEM Part Number: S1-026-42198-000
Product Description: 10X9 Cw Blower Wheel; 1/2"Bore
Weight:7.3lbs/3311.22g

Choose the best HVAC equipment parts and supplies from PartsHnC!

  • Same Day Shipping

  • Best Quality And Best Price

  • Wide Range of Inventory

  • Best Customer Service

Have More Questions or Need Help to Place The Order?
Reach us at (866)773-0907 or [email protected]

Write Your Own Review
You're reviewing:York S1-026-42198-000 Blower Wheel 10" X 9" CW 1/2" Bore
Your Rating
Customer Questions
What maintenance is required for the York S1-026-42198-000 Blower Wheel?

Regularly clean dust and debris from the blower wheel to maintain airflow efficiency and reduce vibration. Inspect for imbalance, wear, and secure mounting set screws to prevent mechanical failure. Ensure proper alignment and follow safety shutdown procedures before servicing.

What are common issues with the York S1-026-42198-000 Blower Wheel?

  • Dust buildup causing reduced airflow and efficiency.
  • Imbalance leading to vibration and noise.
  • Loose set screws causing slippage on shaft.
  • Bent or damaged blades reducing performance.
  • Bearing-related noise or overheating issues.

Installation Steps

Step 1: Turn off power at breaker and verify lockout for safety and confirm unit is isolated.

Step 2: Remove blower access panel carefully inspect compartment for debris.

Step 3: Mark rotation and existing wheel position before removal.

Step 4: Loosen set screw and remove old wheel from shaft retain hardware.

Step 5: Slide new wheel onto shaft and align ensure correct orientation.

Step 6: Tighten set screw securely and check balance verify smooth spin.

Step 7: Reassemble panel restore power test airflow operation run system briefly.