Facebook Pixel

Mitsubishi Electric PAC-US445CN-1 Thermostat Interface Module

Special Price $245.69 Regular Price $272.72
Out of stock
SKU
PAC-US445CN-1
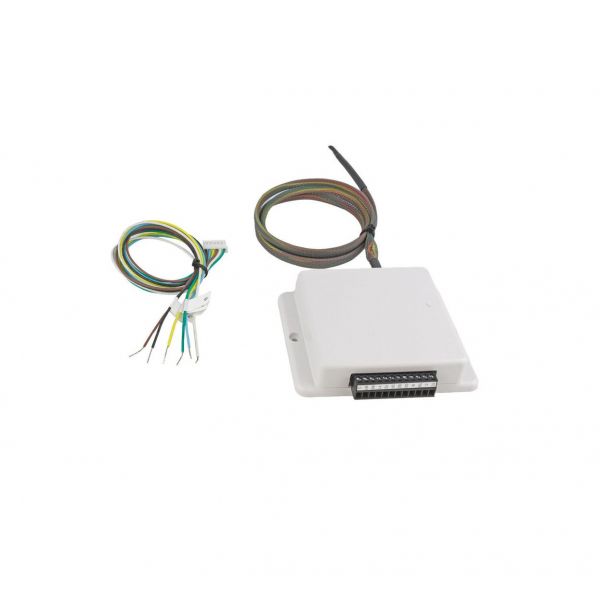
The Mitsubishi Electric PAC-US445CN-1 Thermostat Interface Module is intended for connecting the company’s HVAC systems with modern smart thermostats, including Nest. This compact module has dimensions of 10mm, has a frequency of 60Hz and a voltage of 24V. It has an LCD display with a simple-to-understand message display to show the status of the system and the settings. This module increases the efficiency of HVAC control as the users can control the heating and cooling from a distance, making them comfortable. Through connection to Mitsubishi Electric units, it allows accurate control, programming and monitoring of temperature using compatible smart devices.
https://www.partshnc.com/media/catalog/product/p/a/pac-us445cn-1.jpg

Specifications

  • Size: 0.4"
  • Frequency: 60Hz
  • Controller Type: Nest
  • Voltage: 24V
  • Display Type: LCD
  • Weight: 0.49 Lbs
Manufacturer Name: Mitsubishi Electric
Product Number: PAC-US445CN-1
OEM Part Number: PAC-US445CN-1
Product Description: T-Stat Interface Module
Weight:0.5lbs/226.8g

Choose the best HVAC equipment parts and supplies from PartsHnC!

  • Same Day Shipping

  • Best Quality And Best Price

  • Wide Range of Inventory

  • Best Customer Service

Have More Questions or Need Help to Place The Order?
Reach us at (866)773-0907 or [email protected]

Write Your Own Review
You're reviewing:Mitsubishi Electric PAC-US445CN-1 Thermostat Interface Module
Your Rating
Customer Questions
What maintenance is required for the Mitsubishi Electric PAC-US445CN-1 Thermostat?

Regularly inspect the module for dust and debris buildup, ensuring all connections are secure. Clean contacts gently with a dry cloth or electronic cleaner. Proper maintenance prevents signal errors and ensures reliable thermostat communication, while avoiding electrical hazards.

What are common issues with the Mitsubishi Electric PAC-US445CN-1 Thermostat?

  • Loose or faulty wiring connections.
  • Incorrect temperature readings.
  • Communication errors with HVAC system.
  • Module failing to respond to thermostat commands.

Installation Steps

Step 1: Disconnect power at the breaker and verify the HVAC system is fully de-energized.

Step 2: Mount the interface module securely near the indoor unit using approved fasteners.

Step 3: Connect communication wiring to the indoor unit terminals following the wiring diagram precisely.

Step 4: Attach thermostat wires to the correct interface terminals and tighten securely.

Step 5: Set DIP switches or configuration settings as required.

Step 6: Restore power and test thermostat communication and system operation.