Facebook Pixel

Lennox 78L41 Motor Mount

Special Price $60.52 Regular Price $68.41
In stock
SKU
78L41
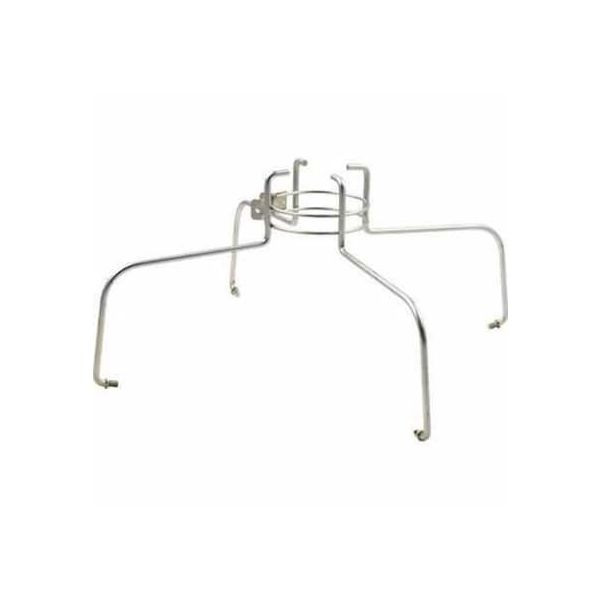
The Lennox 78L41 is a 4-leg motor mount which is an essential part of many different Lennox HVAC equipment systems, as it is designed to both support and insulate motors. It has the crucial function of reducing the vibrations and noise that are produced by the motor from being transferred to the chassis and ductwork of the unit. This leads to low noise production in the HVAC system and helps avoid harm resulting from vibrations. This particular mount is intended for motors with a diameter of 5-5/8 inches.
Manufacturer:
https://www.partshnc.com/media/catalog/product/0/0/0007457_0.jpg

Specifications

  • Diameter: 25.705 Inch
  • Inner Diameter: 5.625 Inch
  • Measure: Unit
  • Weight: 9.55lbs
  • Type: 4-Leg Motor Mount
  • Leg Diameter: 0.375 Inch
  • Number of Legs: 4
  • Mount Type: Mounting
  • Motor Diameter: 5-5/8 Inch
Manufacturer Name: Lennox
Product Number: 78L41
OEM Part Number: 78L41
Product Description: Motor Mount
Weight:9.55lbs/4331.8g

Choose the best HVAC equipment parts and supplies from PartsHnC!

  • Same Day Shipping

  • Best Quality And Best Price

  • Wide Range of Inventory

  • Best Customer Service

Have More Questions or Need Help to Place The Order?
Reach us at (866)773-0907 or [email protected]

Write Your Own Review
You're reviewing:Lennox 78L41 Motor Mount
Your Rating
Customer Questions
What maintenance is required for the Lennox 78L41 Motor Mount?

Check the mounting bracket periodically for bolt tightness and alignment to keep the motor properly seated under vibration. Inspect rubber isolation points or contact surfaces for cracking or compression that could shift motor position. During service, confirm the motor remains centered to prevent pulley or fan imbalance. Keeping the mount stable assists in reducing vibration stress and protects surrounding blower components.

What are common issues with the Lennox 78L41 Motor Mount?

  • Loose mounting bolts leading to motor vibration and noise.
  • Worn rubber isolation points causing misalignment.
  • Frame fatigue or bending under long-term load stress.
  • Motor shift affecting blower wheel balance.
  • Rattling or resonance during high-speed operation.

Installation Steps

Step 1: Shut off electrical power before starting and secure system inactive.

Step 2: Remove access panel carefully and disconnect existing motor mount hardware.

Step 3: Position new motor mount properly aligning holes and support points.

Step 4: Secure fasteners tightly and ensure stable fit without movement firmly.

Step 5: Reconnect components, restore power, test motor alignment and vibration for smooth operation.