Facebook Pixel

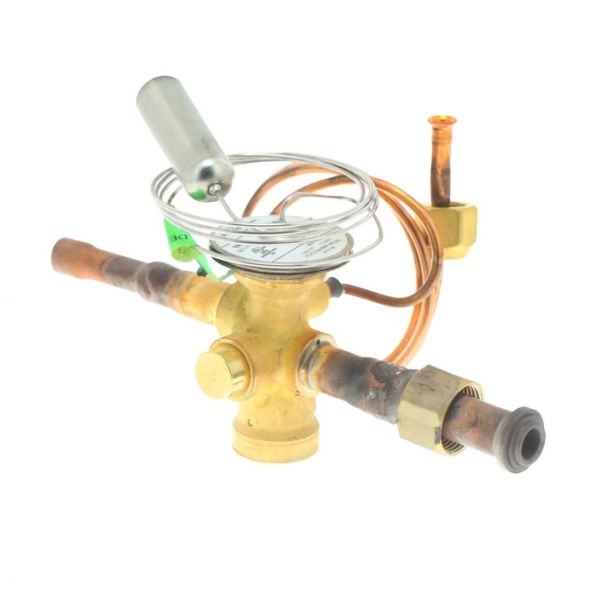
First Company 9EVR410-2 Universal Thermal Expansion Valve (TXV) 42-60K BTU R410 Kit

Special Price $179.70 Regular Price $206.66
In stock
SKU
9EVR410-2
The First Company 9EVR410-2 Universal Thermal Expansion Valve Kit 42-60K BTU R410 is used to regulate the flow of refrigerant into the evaporator coil of air conditioning and heat pump systems. It also keeps the evaporator pressure and temperature in order to facilitate heat exchange. It is an essential part of HVAC systems and it allows for control the cooling capacity and avoiding technical failures. Which is installed in residential and light commercial units, facilitates the stable operation of the system, and components by the incorrect flow of refrigerants and leads to stable, energy-efficient cooling.
Manufacturer:

https://www.partshnc.com/media/catalog/product/9/e/9evr410-2.jpg

Specifications

  • TXV Type: Thermostatic Expansion Valve (TXV)
    Write Your Own Review
    You're reviewing:First Company 9EVR410-2 Universal Thermal Expansion Valve (TXV) 42-60K BTU R410 Kit
    Your Rating
    Customer Questions
    What maintenance is required for the First Company 9EVR410-2 Thermal Expansion Valve?

    Regularly inspect the valve for refrigerant leaks, proper bulb placement, and secure connections. Keep the system clean and free from contaminants. Proper maintenance ensures efficient refrigerant flow and system performance. Always shut off power and depressurize the system before servicing to ensure safety.

    What are common issues with the First Company 9EVR410-2 Thermal Expansion Valve?

    • Improper refrigerant flow or restriction.
    • Valve sticking or failing to regulate pressure.
    • Loss of cooling efficiency.
    • Sensor bulb losing charge or position.
    • Refrigerant leaks at connections.

    Installation Steps

    Step 1: Turn off power to the HVAC system and close all refrigerant valves.

    Step 2: Recover any refrigerant safely before removing the old TXV.

    Step 3: Disconnect the old valve and clean the line connections.

    Step 4: Install the new TXV, aligning it properly.

    Step 5: Connect inlet and outlet lines securely and tighten fittings.

    Step 6: Evacuate the system, check for leaks, and recharge with R410A refrigerant.