Facebook Pixel

Trane EXC1970 Heat Exchanger

Special Price $1,242.99 Regular Price $1,379.72
In stock
SKU
EXC1970
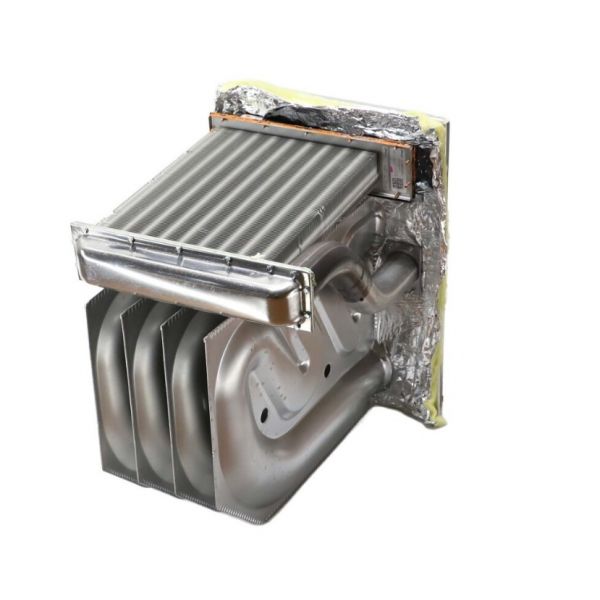
The Trane EXC1970 is a Trane HVAC heat exchanger that is high efficiency. This key piece, approximately 22" tall, 32.5" long and 24.5" wide, is a key heat transfer component. The EXC1970 is a part of your Trane HVAC system, helping the exchange of heat between the refrigerant and air streams. When your system is in cooling operation, warm refrigerant entering the heat exchanger releases heat to the cooler air stream, thus cooling the air that circulates throughout your building. Heat exchanger can work in heating mode, as heat exchanger absorbs heat of warm refrigerant and transfers it to cold air stream, making you hot and comfortable.
Manufacturer:
https://www.partshnc.com/media/catalog/product/e/x/exc1970.jpg

Specifications

  • Height: 22.0"
  • Length: 32.5"
  • Width: 24.5"
  • Weight: 45lbs
Manufacturer Name: Trane
Product Number: EXC1970
OEM Part Number: EXC1970
Product Description: Heat Exchanger
Weight:45lbs/20411.64g

Choose the best HVAC equipment parts and supplies from PartsHnC!

  • Same Day Shipping

  • Best Quality And Best Price

  • Wide Range of Inventory

  • Best Customer Service

Have More Questions or Need Help to Place The Order?
Reach us at (866)773-0907 or [email protected]

Write Your Own Review
You're reviewing:Trane EXC1970 Heat Exchanger
Your Rating
Customer Questions
What maintenance is required for the Trane EXC1970 Heat Exchanger?

Regularly inspect for dust, debris, or corrosion on the heat exchanger surfaces. Ensure proper airflow and clean any buildup in ducts or coils. Check for leaks or cracks and verify secure connections to maintain efficient heat transfer and safe operation.

What are common issues with the Trane EXC1970 Heat Exchanger?

  • Reduced heat transfer efficiency.
  • Leaks or cracks in the exchanger.
  • Corrosion or scaling buildup.
  • Uneven heating or hot/cold spots.

Installation Steps

Step 1: Turn off all power to the HVAC unit before starting.

Step 2: Remove access panels and disconnect old heat exchanger carefully.

Step 3: Position the new one in the designated slot and secure with mounting hardware.

Step 4: Reconnect all gas, water, or refrigerant lines per the manual.

Step 5: Reinstall panels and ensure all connections are tight.

Step 6: Restore power and test system for leaks and proper operation.