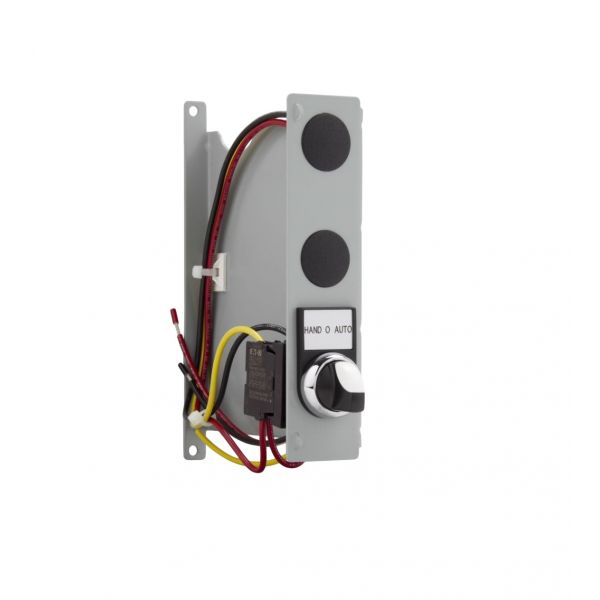
Cutler-Hammer Eaton C600M12 Hand/Off/Auto Selector Switch Control Kit
Special Price $189.20 Regular Price $217.58
In stock
SKU
C600M12

The Cutler Hammer-Eaton C600M12 Hand/Off/Auto Selector Switch Control Kit is an electrical control component used to electronically control the operation modes of HVAC systems. It works with a three-position selector, which can be operated manually, automatically by the system circuit, or fully shut down. Typically, the kit includes the selector switch and mounting hardware for connection to compatible control panels. It is a component of the system control interface installed in control cabinets that enables the HVAC systems to control the operation of fans, pumps, or compressors during normal residential and commercial equipment operation.
Manufacturer: