Facebook Pixel

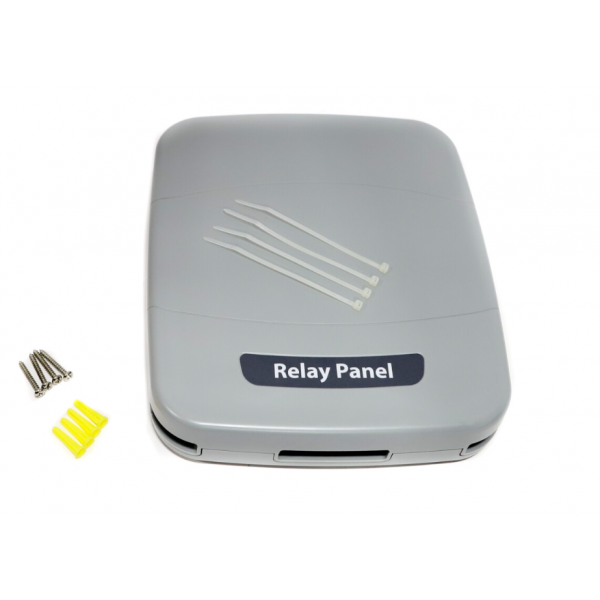
Trane BAY24VRPAC52DC Relay Panel

Special Price $152.66 Regular Price $175.56
In stock
SKU
BAY24VRPAC52DC
The Trane BAY24VRPAC52DC is a Relay Panel which is especially those with 24-volt control systems. It works more as a mediator between the HVAC system and your thermostat if you will. This small panel on the wall measuring approximately 8 inches in width and 9.3 inches in height is responsible for changing low voltage signals from your thermostat into commands for your air conditioning heating or ventilation system. The Relay Panel enhances the safety and efficiency of Trane HVAC equipment since it enhances easy communication and operates on a 24-volt network.
Manufacturer:

https://www.partshnc.com/media/catalog/product/s/c/screenshot_486.png

Specifications

  • Height: 9.3"
  • Width: 8"
  • Weight: 1.67lbs
  • Voltage:24 V
Manufacturer Name: Trane
Product Number: BAY24VRPAC52DC
OEM Part Number: BAY24VRPAC52DC
Product Description: Relay Panel
Weight:1.67lbs/757.5g

Choose the best HVAC equipment parts and supplies from PartsHnC!

  • Same Day Shipping

  • Best Quality And Best Price

  • Wide Range of Inventory

  • Best Customer Service

Have More Questions or Need Help to Place The Order?
Reach us at (866)773-0907 or [email protected]

Write Your Own Review
You're reviewing:Trane BAY24VRPAC52DC Relay Panel
Your Rating
Customer Questions
What maintenance is required for the Trane BAY24VRPAC52DC Relay Panel?

Regularly inspect the relay panel for dust, corrosion, and loose connections. Clean contacts carefully and ensure proper mounting. Verify voltage and circuit operation to prevent problems. Always disconnect power before servicing to ensure safety.

What are common issues with the Trane BAY24VRPAC52DC Relay Panel?

  • Relays failing to engage or disengage.
  • Burnt or pitted contacts.
  • Loose or corroded wiring connections.
  • Intermittent or erratic operation.

Installation Steps

Step1: Ensure the HVAC system is powered off.

Step2: Remove any panels or covers to access the existing relay panel.

Step3: Disconnect the old relay panel, noting all wiring and connections.

Step4: Install the new relay panel securely in place, aligning all terminals.

Step5: Reconnect all wires according to the original configuration.

Step6: Replace panels, restore power, and test the system for proper operation.