Facebook Pixel

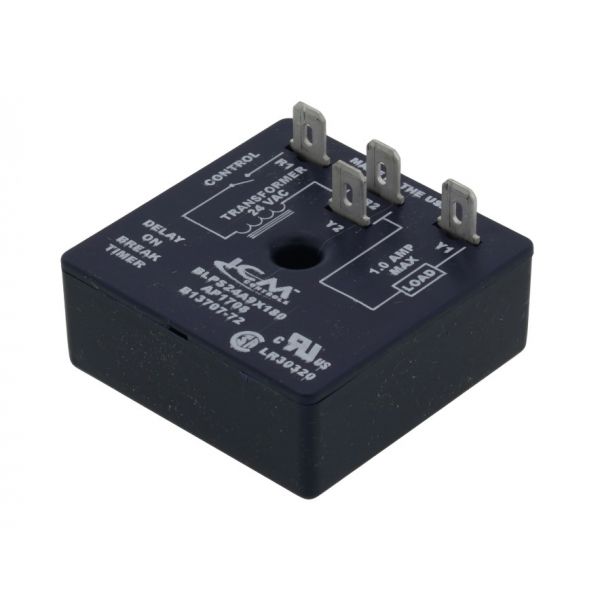
Amana-Goodman B1370772SP Time Delay Relay 180 Sec

Special Price $24.51 Regular Price $31.86
Out of stock
SKU
B1370772SP
The Amana-Goodman B1370772SP Relay Time Delay is an essential component in controlling the delay of some operations in HVAC systems. By adding a 180-second delay, relay is designed to reduce the risk of damage to the essential components by regulating the timing of the operational actions. Ensure the consistent operation between steps during system power-up and power-down, extended system durability, and better performance. This relay reduces the possibility of harm to essential parts as compressors, by control the time of power operations. Major advantages include decreased risk of damage, maintained system efficiency, and increased equipment durability.
Manufacturer:

https://www.partshnc.com/media/catalog/product/b/1/b1370772sp.jpg
Manufacturer Name: Amana-Goodman
Product Number: B1370772SP
OEM Part Number: B1370772SP
Product Description: Relay Time Delay 180 Sec
Weight:0.09lbs/40.82g

Choose the best HVAC equipment parts and supplies from PartsHnC!

  • Same Day Shipping

  • Best Quality And Best Price

  • Wide Range of Inventory

  • Best Customer Service

Have More Questions or Need Help to Place The Order?
Reach us at (866)773-0907 or [email protected]

Write Your Own Review
You're reviewing:Amana-Goodman B1370772SP Time Delay Relay 180 Sec
Your Rating
Customer Questions
What maintenance is required for the Amana-Goodman B1370772SP Time Delay Relay?

Regularly inspect the relay for dust, corrosion, or loose wiring connections. Ensure terminals are tight and check for signs of overheating or burn marks. Keep the area dry and clean to maintain proper electrical timing and safe operation.

What are common issues with the Amana-Goodman B1370772SP Time Delay Relay?

  • Failure to energize or switch at the correct delay.
  • Delayed or inconsistent switching cycles.
  • Contacts sticking or failing to open/close properly.
  • Loose connections causing inconsistent performance.

Installation Steps

Step 1: Ensure the power source is turned off before starting.

Step 2: Locate the existing time delay relay and remove it from its socket or mounting.

Step 3: Disconnect all wiring carefully, noting the original connections.

Step 4: Insert the new relay into place and secure it if required.

Step 5: Reconnect the electrical wires following the original configuration.

Step 6: Restore power and test the relay for proper timing operation.