Facebook Pixel

Trane AZON1050AC52ZB Acculink Thermostat

Special Price $612.35 Regular Price $679.71
In stock
SKU
AZON1050AC52ZB
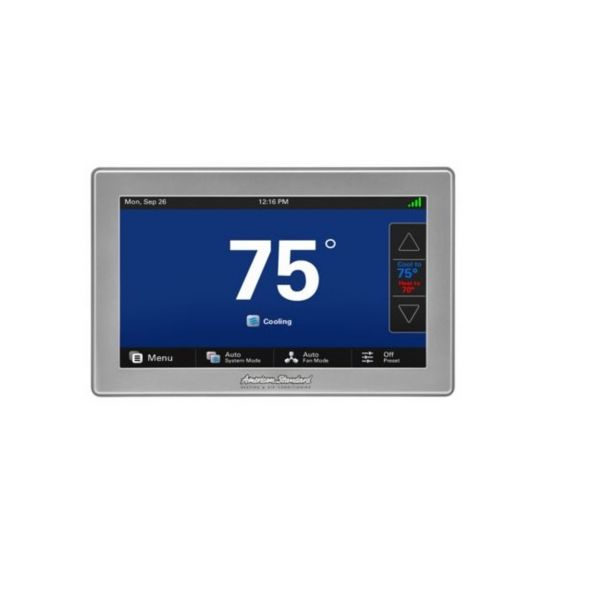
The Trane AZON1050AC52ZB Acculink Thermostat is the s behind your comfort, controlling temperature accurately in Trane HVAC system. This sleek thermostat has dimensions of about 10.25-inch length, 6.625-inch width, and 2.75-inch height to allow any user to easily control their space’s temperature. The AZON1050AC52ZB is unique from basic thermostats in that it is programmable. This also enables you to set individual heating and cooling preferences that will suit your needs to the letter. With these programs, you can provide comfortable living conditions and possibly save energy and money on utilities.
Manufacturer:
https://www.partshnc.com/media/catalog/product/a/z/azon1050ac52zb_trane_partshnc.jpg

Specifications

  • Height: 2.75"
  • Length: 10.25"
  • Width: 6.625"
  • Weight: 1.86 lbs
Manufacturer Name: Trane
Product Number: AZON1050AC52ZB
OEM Part Number: AZON1050AC52ZB
Product Description: Acculink Thermostat
Weight:1.86lbs/843.68g

Choose the best HVAC equipment parts and supplies from PartsHnC!

  • Same Day Shipping

  • Best Quality And Best Price

  • Wide Range of Inventory

  • Best Customer Service

Have More Questions or Need Help to Place The Order?
Reach us at (866)773-0907 or [email protected]

Write Your Own Review
You're reviewing:Trane AZON1050AC52ZB Acculink Thermostat
Your Rating
Customer Questions
What maintenance is required for the Trane AZON1050AC52ZB Acculink Thermostat?

Regularly clean the thermostat surface to prevent dust buildup and ensure accurate readings. Check the batteries and replace if needed, and verify proper connection to the HVAC system. Proper care ensures accurate temperature control and system efficiency.

What are common issues with the Trane AZON1050AC52ZB Acculink Thermostat?

  • Inaccurate temperature readings.
  • Unresponsive or frozen display.
  • Communication errors with HVAC system.
  • Erratic system cycling or control delays.

Installation Steps

Step 1: Turn off power to HVAC system at the breaker to ensure safety.

Step 2: Remove the existing thermostat from the wall and label the wires.

Step 3: Mount the new onwe securely on the wall using screws and anchors.

Step 4: Connect the labeled wires to the corresponding terminals on the thermostat.

Step 5: Attach the thermostat display unit to the base.

Step 6: Restore power and follow the on-screen setup to configure temperature settings.