Facebook Pixel

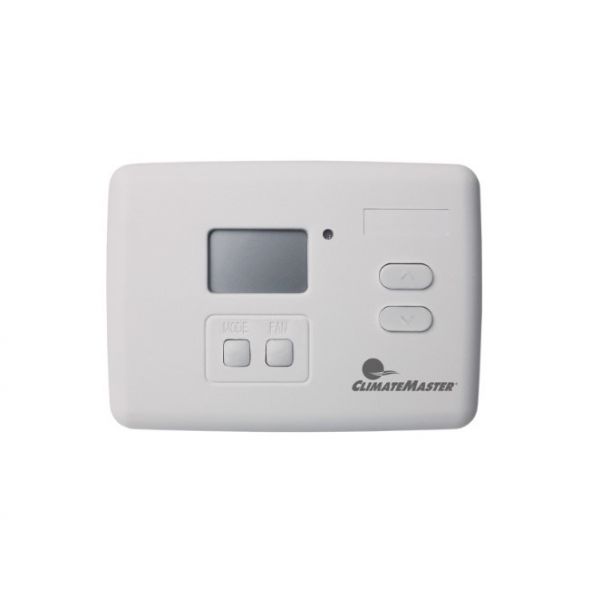
ClimateMaster ATA11U01 Non Programmable Thermostats 1H/1C

Special Price $121.94 Regular Price $140.23
In stock
SKU
ATA11U01

The ClimateMaster ATA11U01 is a non-programmable thermostat that allows for simple temperature control in your home or workplace. It has simple heating and cooling settings that let you manually change the fan speed and temperature to your preferred level. Compatible ClimateMaster HVAC systems, such as the Tranquility Digital Series models, can be used with this easy-to-use thermostat. All you need to do for an easy installation is switch off the power to your unit and follow the wiring instructions that come with it. Despite its simplicity, the ATA11U01 provides dependable temperature control at a reasonable cost, making it a good option for anyone looking for a straightforward solution for their comfort requirements.

Thermostats,
Manufacturer:
https://www.partshnc.com/media/catalog/product/a/t/ata11u01.jpg

Product Overview:
Water-source heat pump systems require dependable room temperature control to coordinate heating and cooling operation according to indoor conditions. The ClimateMaster ATA11U01 Non-Programmable Thermostat is an OEM control designed for single-stage HVAC applications. Its 1H/1C configuration supports one heating stage and one cooling stage, allowing users to adjust and maintain the desired indoor temperature through manual settings. Without programmable scheduling, it provides straightforward temperature control for designated ClimateMaster water-source heat pump systems.

Single-Stage Temperature Control:
The thermostat uses electronic temperature sensing and switching to regulate heating and cooling demand. Its 1H/1C configuration supports single-stage equipment operation, providing separate control outputs for heating and cooling demand. This arrangement is intended for systems that do not require multi-stage temperature control.

Operating Modes and Fan Control:
The thermostat provides HEAT, OFF, COOL, and AUTO operating modes for managing system operation. Selectable ON and AUTO fan settings allow continuous or automatic fan operation according to the selected configuration. Automatic and manual changeover options determine how the thermostat transitions between heating and cooling. An integrated fault LED provides an indication of equipment fault conditions.

Replacement Guidelines:
When evaluating the ClimateMaster ATA11U01 Non-Programmable Thermostat for replacement, verify that the existing control uses a 1H/1C configuration and is intended for a 24V water-source heat pump application. Compare the 18–30 VAC input rating, 50/60 Hz frequency, and maximum output current of 1 Amp per output with the equipment's control requirements. Also confirm the required heating and cooling outputs, fan control settings, automatic or manual changeover configuration, and wiring arrangement before ordering.

Common Failure Symptoms:

  • Inconsistent indoor temperature regulation despite unchanged thermostat settings
  • Heating or cooling equipment failing to respond to temperature adjustments.
  • Incorrect switching between heating and cooling modes.
  • Fan operation becoming inconsistent with the selected fan setting.
  • Blank or irregular temperature display affecting normal thermostat operation.

Equipment Compatibility:
The ClimateMaster ATA11U01 OEM thermostat is designed for designated 24V water-source heat pump systems requiring single-stage heating and cooling control. Its application includes selected ClimateMaster commercial heat pump equipment using CXM, DXM, or DXM2 control configurations. Verify the complete equipment model, control board configuration, wiring arrangement, and thermostat requirements to establish the correct application for this OEM control.

Technical Specifications:
Brand: ClimateMaster
Part Number: ATA11U01
Equipment Type: Water-Source Heat Pump
Heating Stages: 1H
Cooling Stages: 1C

Write Your Own Review
You're reviewing:ClimateMaster ATA11U01 Non Programmable Thermostats 1H/1C
Your Rating
Customer Questions
What maintenance is required for the ClimateMaster ATA11U01 Non Programmable Thermostat?

Dust buildup on thermostat housing can affect temperature sensing accuracy over time. Clean gently with a dry cloth and ensure wiring connections remain tight and corrosion-free. Regular inspection maintains accurate heating and cooling control and prevents system misreadings.

What are common issues with the ClimateMaster ATA11U01 Non Programmable Thermostat?

  • Temperature drift causing inaccurate room readings.
  • Unresponsive heating or cooling switching due to worn relays.
  • Display or dial wear leading to unclear settings.
  • Wiring faults causing intermittent thermostat operation issues.

Which ClimateMaster control configurations are associated with the ATA11U01 thermostat?

The ATA11U01 is intended for designated ClimateMaster water-source heat pump applications using CXM, DXM, or DXM2 control configurations. The specific equipment model and control requirements should be verified before ordering.

Can the ATA11U01 operate both heating and cooling equipment?

Yes. Its 1H/1C configuration supports one heating stage and one cooling stage, making it suitable for designated single-stage heating and cooling applications.

Is the ClimateMaster ATA11U01 an OEM thermostat?

Yes. The ATA11U01 is an OEM ClimateMaster thermostat designed for designated ClimateMaster water-source heat pump systems.

What electrical requirements should be checked before purchasing the ATA11U01?

Verify the 18–30 VAC input voltage, 50/60 Hz frequency, and maximum output current of 1 Amp per output against the existing thermostat and equipment control requirements.

Does the ATA11U01 retain its temperature settings during a power outage?

Yes. Its temperature setpoints are stored in permanent memory without requiring batteries, allowing saved settings to be retained during power interruptions.

Installation Steps

Step 1: Turn off power at breaker to HVAC system to avoid electrical shock.

Step 2: Remove old thermostat and label wires for reference.

Step 3: Mount new thermostat base plate to wall, level it, and secure with screws.

Step 4: Connect wires to corresponding terminals following manual wiring diagram.

Step 5: Attach thermostat cover, restore power, and test heating/cooling modes carefully.