
Facebook Pixel

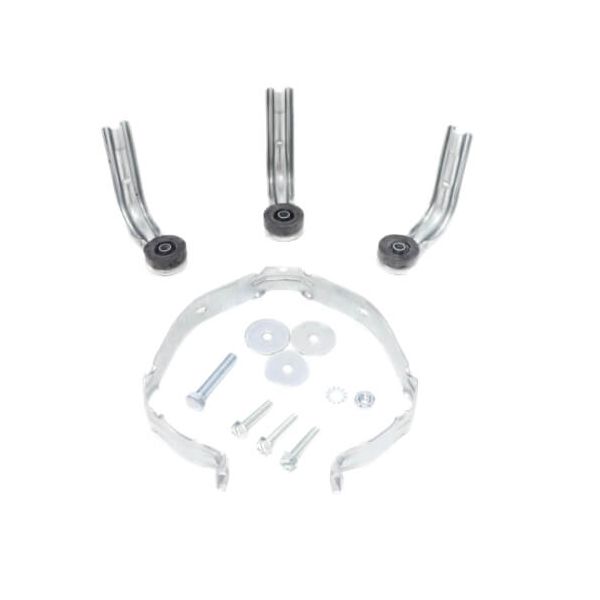
Nordyne 913871 Motor Mount

Special Price $39.10 Regular Price $50.83
In stock
SKU
913871
The Nordyne 913871 Motor Mount positions an electric motor within compatible equipment, maintaining its position relative to drive components in HVAC systems. Its mounting structure provides attachment points for securing the motor to the equipment frame while keeping the drive arrangement aligned. The mount is fitted during assembly or replacement, with the motor fastened to the support before connected components are aligned. Holding the motor housing against the equipment structure controls movement during rotation and maintains the position needed for connected fan or blower assemblies.
Manufacturer:

https://www.partshnc.com/media/catalog/product/9/1/913871_nordyne_partshnc.jpg
Manufacturer Name: Nordyne
Product Number: 913871
OEM Part Number: 913871
Product Description: Motor Mount
Weight:1.19lbs/539.77g

Choose the best HVAC equipment parts and supplies from PartsHnC!

  • Same Day Shipping

  • Best Quality And Best Price

  • Wide Range of Inventory

  • Best Customer Service

Have More Questions or Need Help to Place The Order?
Reach us at (866)773-0907 or [email protected]

Write Your Own Review
You're reviewing:Nordyne 913871 Motor Mount
Your Rating
Customer Questions
What maintenance is required for the Nordyne 913871 Motor Mount?

Regularly inspect the motor mount for signs of wear, cracks, or loosening. Ensure all mounting hardware is securely tightened to prevent vibration. Clean away dust and debris buildup to stabilize. Proper support ensures safe motor operation and reduces the risk of mechanical failure.

What are common issues with the Nordyne 913871 Motor Mount?

  • Cracking or material fatigue over time.
  • Loosening of mounting hardware causing vibration.
  • Misalignment leading to motor instability.
  • Excessive noise due to worn or damaged mount components.

Installation Steps

Step 1: Disconnect power and apply lockout/tagout to ensure safe servicing.

Step 2: Remove blower or motor assembly access panel and support motor before loosening mounts.

Step 3: Detach old motor mount hardware and clean mounting surface.

Step 4: Install new motor mount, aligning holes and ensuring correct motor seating position.

Step 5: Tighten fasteners evenly to prevent vibration or misalignment.

Step 6: Reinstall motor assembly and Check shaft alignment and belt tension if applicable.

Step 7: Restore power and test operation, checking for vibration, noise, and stable motor performance