Facebook Pixel

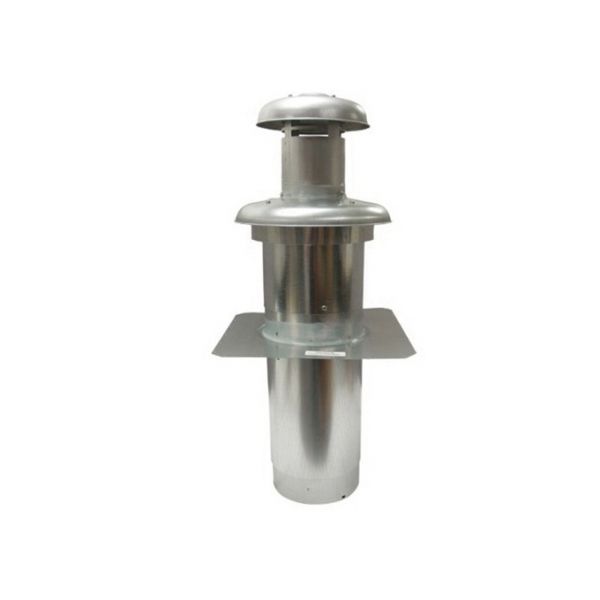
Nordyne 903662 Flue Assembly Roof Jack Kit

Special Price $202.95 Regular Price $225.27
In stock
SKU
903662
Nordyne 903662 Flue Assembly-Roof Jack Kit is a very essential part for safe as well as effective discharge of HVAC systems. The kit is made specifically for use together with Nordyne furnaces to ensure proper expulsion of combustion gases in your heating system. A strong roof jack and all other needed connectors are comprised within this assembly to make it easy and secure to install. This roof jack has a weatherproof design which keeps off harsh elements guaranteeing its long lasting performance and reliability. It helps in maintaining good quality indoor air by taking out exhausts from the building thus avoiding possible hazards.
Manufacturer:

https://www.partshnc.com/media/catalog/product/9/0/903662.jpg

Specifications

  • Type: Flue Assembly
  • Length: 21" to 35"
  • Nominal Size: 5"
Manufacturer Name: Nordyne
Product Number: 903662
OEM Part Number: 903662
Product Description: Flue Assy (Roof Jack Kit)
Weight:17.5lbs/7937.86g

Choose the best HVAC equipment parts and supplies from PartsHnC!

  • Same Day Shipping

  • Best Quality And Best Price

  • Wide Range of Inventory

  • Best Customer Service

Have More Questions or Need Help to Place The Order?
Reach us at (866)773-0907 or [email protected]

Write Your Own Review
You're reviewing:Nordyne 903662 Flue Assembly Roof Jack Kit
Your Rating
Customer Questions
What maintenance is required for the Nordyne 903662 Roof Jack Kit?

Regularly inspect the flue assembly for debris, corrosion, or loose fittings. Ensure seals and flashing are intact to prevent leaks and maintain proper ventilation. Clean any obstructions carefully and always follow safety precautions when working on the roof.

What are common issues with the Nordyne 903662 Roof Jack Kit?

  • Improper venting or restricted airflow.
  • Corrosion or rust on metal components.
  • Loose or damaged seals.
  • Leaks around roof penetration.

Installation Steps

Step 1: Ensure the work area is clear and wear appropriate safety gear.

Step 2: Mark and cut the roof opening to the required size.

Step 3: Position the roof jack over the opening and secure it with roofing fasteners.

Step 4: Apply sealant around edges to prevent water leaks.

Step 5: Insert and secure the flue pipe through the roof jack.

Step 6: Check all connections for stability and proper sealing before use.