Facebook Pixel

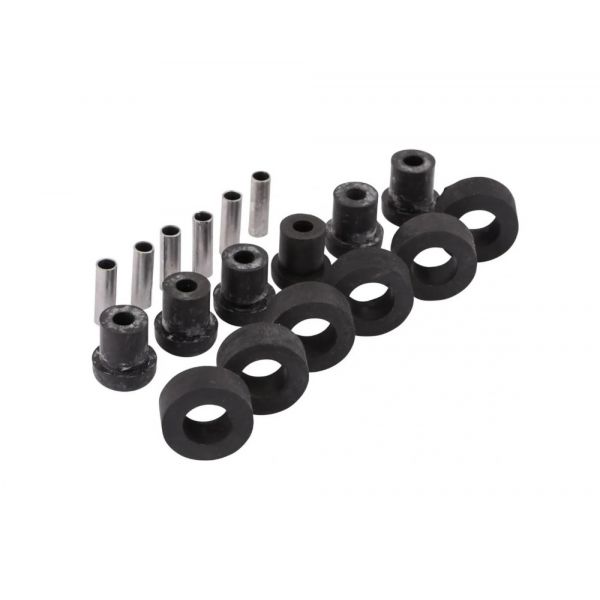
Lennox 71M48 Blower Hardware Kit

Special Price $62.99 Regular Price $72.44
In stock
SKU
71M48
The Lennox 71M48 Blower Hardware Kit is an assembly enables the correct fixing and operation of blower assemblies in HVAC systems. This package contains all the hardware requirements, such as screws, brackets, and mounting equipment, which have been specially developed for use in furnaces and air handlers. The 71M48 kit comes with a full set of high-quality parts, which guarantees a correct and strong connection of the blower motor and fan assembly that is vital for proper air circulation and system performance.
https://www.partshnc.com/media/catalog/product/7/1/71m48.jpg

Specifications

  • Measure:Unit
  • Weight:0.35lbs
  • Length:7.75 Inch
  • width:6.75Inch
Manufacturer Name: Lennox
Product Number: 71M48
OEM Part Number: 71M48
Product Description: Blower Hardware Kit
Weight:0.35lbs/158.76g

Choose the best HVAC equipment parts and supplies from PartsHnC!

  • Same Day Shipping

  • Best Quality And Best Price

  • Wide Range of Inventory

  • Best Customer Service

Have More Questions or Need Help to Place The Order?
Reach us at (866)773-0907 or [email protected]

Write Your Own Review
You're reviewing:Lennox 71M48 Blower Hardware Kit
Your Rating
Customer Questions
What maintenance is required for the Lennox 71M48 Blower Hardware Kit?

Tighten blower mounting hardware to keep the assembly secure and vibration-free. Keep parts clean to prevent dust buildup and airflow restriction. Inspect regularly to catch loose components early and avoid failure.

What are common issues with the Lennox 71M48 Blower Hardware Kit?

  • Loose or missing mounting hardware is causing instability.
  • Stripped threads or fastener failure.
  • Improper fit with blower assembly.
  • Excess vibration or noise during operation.
  • Corrosion or wear on metal components.
  • Incorrect installation alignment issues.

Installation Steps

Step 1: Turn off power at breaker and check safe lockout.

Step 2: Remove old blower access panel and inspect wiring area.

Step 3: Replace mounts screws and bushings as needed from kit.

Step 4: Secure new blower assembly align wheel and tighten hardware firmly.

Step 5: Restore power test operation check vibration and airflow stability.