
Facebook Pixel

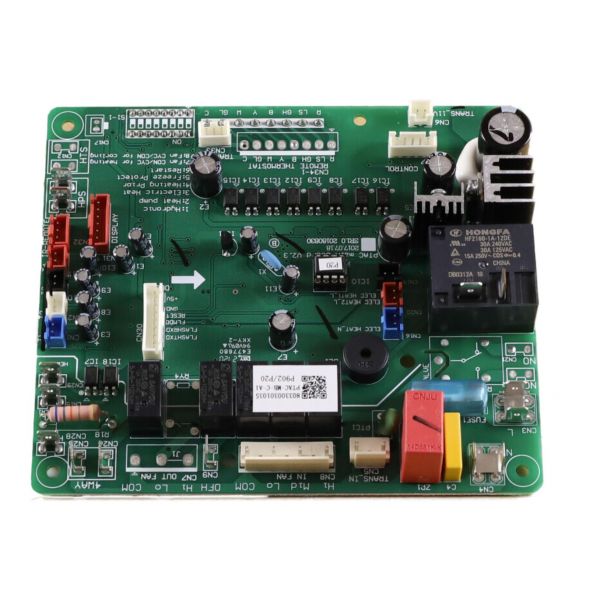
Friedrich 67808007 Electronic Control Board

Special Price $112.47 Regular Price $129.34
Out of stock
SKU
67808007
The Friedrich Air Conditioning 67808007 Electronic Control Board is an essential part needed for the functioning of Friedrich air conditioning HVAC system. The electronic control board controls many operations of the HVAC unit including the temperature, fan, and operational check. It has a temperature range of 60°F to 90°F and is meant to work under ordinary room temperature for accurate climate control. The board operates at 115 VAC, and with a current of 10A which serves the electric need of the other parts of the HVAC system. This control board offers more reliability of system, improved temperature regulation, and ability to identify and solve problems within operations.
https://www.partshnc.com/media/catalog/product/6/7/67808007_FriedrichAirConditioning_partshnc.jpg

Specifications

  • Temperature Range: 60°F to 90°F
  • Type: Electronic Control Board
  • Voltage: 115 VAC
  • Current Rating: 10A
  • Weight: 0.71 Lbs
Manufacturer Name: Friedrich Air Conditioning
Product Number: 67808007
OEM Part Number: 67808007
Product Description: Electronic Cntrl Board
Weight:0.71lbs/322.05g

Choose the best HVAC equipment parts and supplies from PartsHnC!

  • Same Day Shipping

  • Best Quality And Best Price

  • Wide Range of Inventory

  • Best Customer Service

Have More Questions or Need Help to Place The Order?
Reach us at (866)773-0907 or [email protected]

Write Your Own Review
You're reviewing:Friedrich 67808007 Electronic Control Board
Your Rating
Customer Questions
What maintenance is required for the Friedrich 67808007 Control Board?

Regularly inspect for dust, dirt, or moisture accumulation and clean gently with compressed air. Check all wiring and connections for secure attachment. Proper support prevents malfunctions and ensures the board operates safely and accurately.

What are common issues with the Friedrich 67808007 Control Board?

  • System not powering on.
  • Intermittent or failed functions.
  • Burnt or damaged circuitry.
  • Faulty sensor inputs or outputs.

Installation Steps

Step 1: Turn off power at breaker and discharge any stored electrical energy.

Step 2: Remove front panel and locate existing control board wiring.

Step 3: Carefully disconnect all connectors, labeling wires for reassembly.

Step 4: Remove mounting screws and replace with new board.

Step 5: Reconnect wiring harnesses securely according to schematic.

Step 6: Restore power, run system diagnostics, and verify correct operation.