Facebook Pixel

ClimateMaster 62C0015N01 Water Coil Coax K018 Copper

Special Price $569.74 Regular Price $632.41
In stock
SKU
62C0015N01

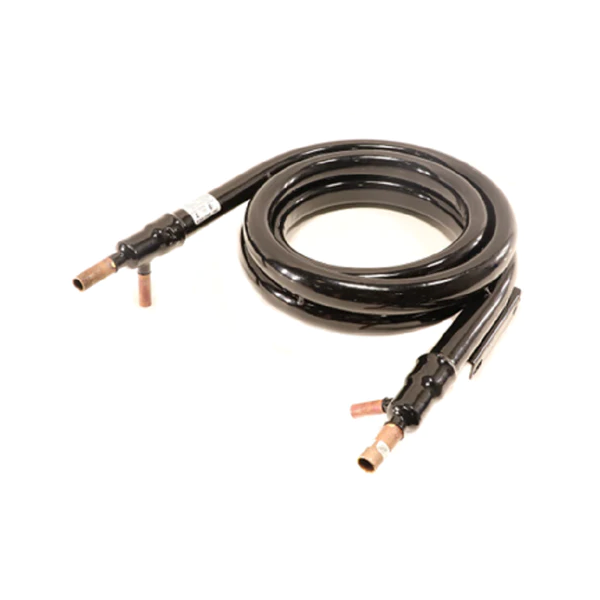
ClimateMaster 62C0015N01 Water Coil Coax K018. A key component made especially for inclusion into ClimateMaster geothermal heat pumps is copper. This water coil is critical in permitting efficient heat exchange between the water circulating in your geothermal system and the refrigerant in the heat pump. The use of copper in its construction guarantees excellent heat transfer qualities, which contribute to high performance and long-term durability. You can expect a variety of benefits from installing this water coil into your heating and cooling system. Among them is a reduction in energy and electricity bills due to greater system efficiency. Its sturdy design also ensures dependable performance over a longer time frame, reducing the need for periodic repairs or replacements.

https://www.partshnc.com/media/catalog/product/6/2/62c0015n01_climatemaster_partshnc_2.png
Manufacturer Name: ClimateMaster
Product Number: 62C0015N01
OEM Part Number: 62C0015N01
Product Description: Water Coil Coax K018 Copper
Weight:17.7lbs/8028.58g

Choose the best HVAC equipment parts and supplies from PartsHnC!

  • Same Day Shipping

  • Best Quality And Best Price

  • Wide Range of Inventory

  • Best Customer Service

Have More Questions or Need Help to Place The Order?
Reach us at (866)773-0907 or [email protected]

Write Your Own Review
You're reviewing:ClimateMaster 62C0015N01 Water Coil Coax K018 Copper
Your Rating
Customer Questions
What maintenance is required for the ClimateMaster 62C0015N01 Water Coil Coax?

Regularly inspect the coil for corrosion, leaks, or mineral buildup. Clean gently with a soft brush or coil cleaner to maintain heat transfer efficiency. Ensure proper water flow and secure connections to prevent system damage. Always shut off water and power before servicing for safety.

What are common issues with the ClimateMaster 62C0015N01 Water Coil Coax?

  • Reduced water flow due to clogs.
  • Leaks at coil connections or tubing.
  • Corrosion or pitting on copper surfaces.
  • Sediment buildup affecting heat transfer efficiency.

Installation Steps

Step1: Turn off the HVAC system and shut off water supply to avoid injury.

Step2: Remove the existing coil carefully, noting pipe connections.

Step3: Inspect and clean the coil housing and surrounding area.

Step4: Position the coil into the unit, aligning inlet and outlet ports.

Step5: Secure mounting brackets and tighten connections.

Step6: Reconnect water lines, check for leaks, and restore system power.

Step7: Test the system to ensure proper operation.