Facebook Pixel

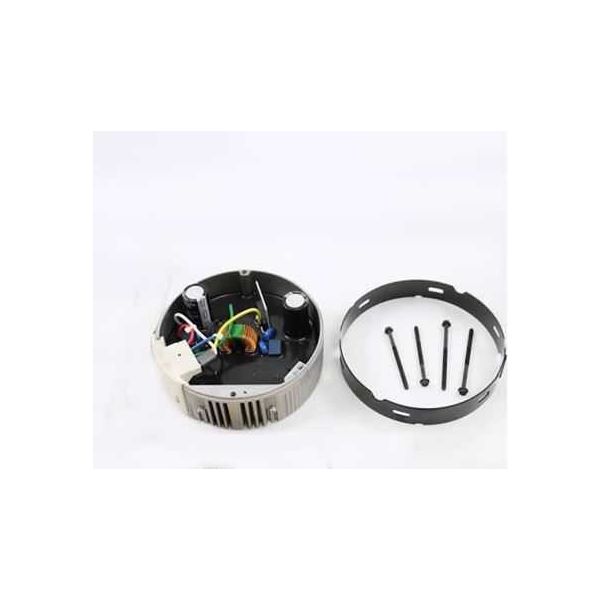
Lennox 10U45 Module Kit W/Spacer 611297-17

Special Price $1,004.98 Regular Price $1,115.53
In stock
SKU
10U45
The Lennox 10U45 611297-17 is a Module Kit with Spacer is an replacement part for HVAC systems that work with the 5.0 ECM technology. This kit may include the control module, the main part of the system, which controls the variable speed of the ECM motor. This kind of control can maximize comfort and may even minimize energy use by heating and cooling in accordance with the exact requirement. It also makes sure that it properly fits within your Lennox HVAC unit.
https://www.partshnc.com/media/catalog/product/0/0/0008511_0.jpg

Specifications

  • Weight:2.48lbs
  • Measure:Unit
  • Type: 5.0 ECM Control Module Kit
Manufacturer Name: Lennox
Product Number: 10U45
OEM Part Number: 10U45
Product Description: 611297-17 Module Kit W/ Spacer
Weight:2.48lbs/1124.91g

Choose the best HVAC equipment parts and supplies from PartsHnC!

  • Same Day Shipping

  • Best Quality And Best Price

  • Wide Range of Inventory

  • Best Customer Service

Have More Questions or Need Help to Place The Order?
Reach us at (866)773-0907 or [email protected]

Write Your Own Review
You're reviewing:Lennox 10U45 Module Kit W/Spacer 611297-17
Your Rating
Customer Questions
What maintenance is required for the Lennox 10U45 Module Kit With Spacer?

Inspect the module kit connections for looseness and ensure spacer alignment remains secure during service. Keep the unit free from dust and moisture buildup to maintain accurate operation. Always disconnect power before servicing to prevent electrical hazards.

What are common issues with the Lennox 10U45 Module Kit With Spacer?

  • Loose electrical connections causing intermittent operation.
  • Spacer misalignment leading to improper module seating.
  • Wiring or signal faults disrupting system communication.
  • Corrosion or contact wear affecting performance.

Installation Steps

Step 1: Turn off HVAC power at the breaker and verify the system is de-energized.

Step 2: Remove the blower compartment access panel to reach the existing control module.

Step 3: Disconnect wiring carefully and note terminal locations before removing the old module.

Step 4: Install the spacer and mount the new module kit securely in place.

Step 5: Reconnect all wiring harnesses firmly and inspect for loose connections.

Step 6: Restore power, test blower operation, and confirm proper motor and airflow performance.