Facebook Pixel

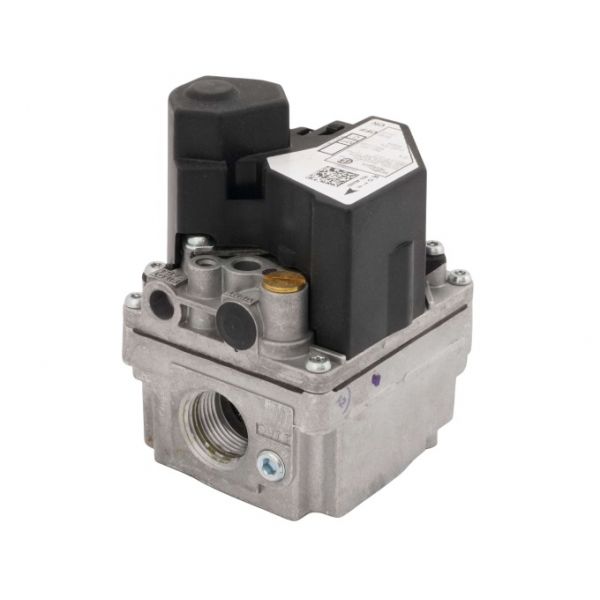
Carlin 50824S Gas Valve 24V White Rodgers

Special Price $110.78 Regular Price $127.40
In stock
SKU
50824S
The Carlin 50824S Gas Valve 24V is an essential component that is utilized in HVAC systems to control the flow of fuel to burners in gas-fired furnaces and heating equipment. It works by opening and closing based on the signals of the control board to ensure that there is proper combustion and safe operation. It is used in commercial and residential heating systems and has a vital role in the system concept, in which it regulates the supply of gas and sustains the stable operation of burners.
Manufacturer:

https://www.partshnc.com/media/catalog/product/5/0/50824s.jpg
Manufacturer Name: Carlin
Product Number: 50824S
OEM Part Number: 50824S
Product Description: 24V Gas Valve (White Rodgers)
Weight:3lbs/1360.78g

Choose the best HVAC equipment parts and supplies from PartsHnC!

  • Same Day Shipping

  • Best Quality And Best Price

  • Wide Range of Inventory

  • Best Customer Service

Have More Questions or Need Help to Place The Order?
Reach us at (866)773-0907 or [email protected]

Write Your Own Review
You're reviewing:Carlin 50824S Gas Valve 24V White Rodgers
Your Rating
Customer Questions
What maintenance is required for the Carlin 50824S Gas Valve?

Inspect valve terminals and gas fittings to ensure tight connections and proper sealing. Keep the surrounding area clean to prevent contamination. Regularly monitor burner response to verify smooth valve actuation and steady fuel delivery.

What are common issues with the Carlin 50824S Gas Valve?

  • Valve not opening fully.
  • Gas flow interruption occurring.
  • Delayed burner response.
  • Electrical coil failure developing.
  • Leakage at connection points.

Installation Steps

Step 1: Turn off gas supply and shut down electrical power to the unit.

Step 2: Remove access panel and label existing gas and wiring connections.

Step 3: Disconnect old valve from inlet/outlet gas piping carefully.

Step 4: Install new valve in correct flow direction and tighten fittings securely.

Step 5: Reconnect electrical terminals exactly as labeled.

Step 6: Perform a full leak test on all joints using proper leak solution.

Step 7: Restore power and gas, then test operation.