
Facebook Pixel

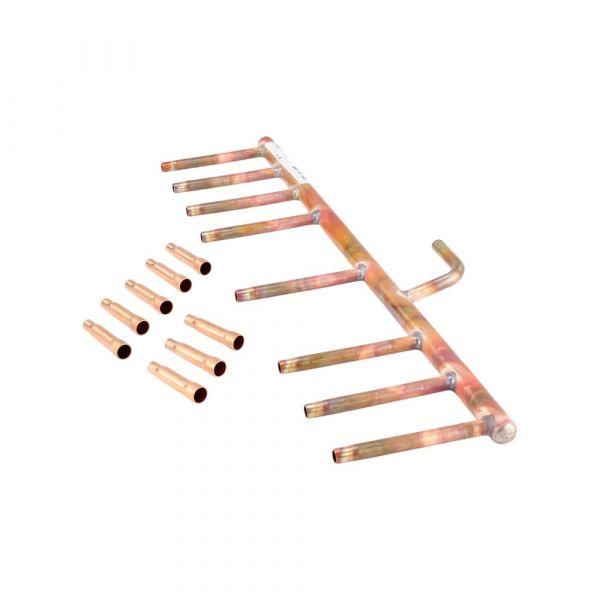
Carrier 48TM401170 Header Assembly W/Meter Device

Special Price $997.76 Regular Price $1,107.52
In stock
SKU
48TM401170
The Carrier 48TM401170 Header Assembly With Meter Device is an essential part of optimizing the HVAC system efficiency and effectiveness. It’s an assembly that also permits the distribution of refrigerant through the system to ensure safe taking of cold or heat in commercial or industrial areas. It’s compact but robust, with dimensions of 19.25" in length and 6.0" in width and height. This assembly is equipped with a metering device that accurately measures the flow of refrigerant, so thereby ensuring precise flow level and temperature control and regulation. Buy the Carrier Header Assembly for better HVAC performance and cost efficiency.
https://www.partshnc.com/media/catalog/product/4/8/48tm401170.jpg

Specifications

  • Length: 19.25 "
  • Width: 6.0 "
  • Height: 6.0 "
  • CSA Lsiting: Yes
  • UOM: EA
  • Weight: 2.23 Lbs
Manufacturer Name: Carrier
Product Number: 48TM401170
OEM Part Number: 48TM401170
Product Description: Header Assembly W/Meter Device
Weight:2.23lbs/1011.51g

Choose the best HVAC equipment parts and supplies from PartsHnC!

  • Same Day Shipping

  • Best Quality And Best Price

  • Wide Range of Inventory

  • Best Customer Service

Have More Questions or Need Help to Place The Order?
Reach us at (866)773-0907 or [email protected]

Write Your Own Review
You're reviewing:Carrier 48TM401170 Header Assembly W/Meter Device
Your Rating
Customer Questions
What maintenance is required for the Carrier 48TM401170 Header Assembly?

Inspect the header assembly regularly for leaks, corrosion, and loose fittings. Ensure the meter device is calibrated and functioning correctly. Clean debris buildup to maintain flow efficiency. Proper maintenance improves system accurate and prevents unexpected system performance issues.

What are common issues with the Carrier 48TM401170 Header Assembly?

  • Leaks at connection points causing pressure loss.
  • Inaccurate meter device readings affecting system monitoring.
  • Clogging or restricted flow within header assembly.
  • Corrosion or wear on internal components.
  • Loose fittings leading to leakage and inefficiency.

Installation Steps

Step 1: Turn off power and recover refrigerant from the system before opening any lines.

Step 2: Remove access panels and carefully disconnect refrigerant lines from the existing header assembly.

Step 3: Remove the old header and inspect tubing for wear, contamination, or damage.

Step 4: Install the new assembly, ensuring correct orientation of the metering system and secure brazed joints.

Step 5: Use nitrogen purge while brazing to secure oxidation and ensure clean internal lines.

Step 6: Leak test, evacuate to proper vacuum level, and recharge system with correct refrigerant.

Step 7: Restore power and check proper pressures, temperature split, and stable system operation.