Facebook Pixel

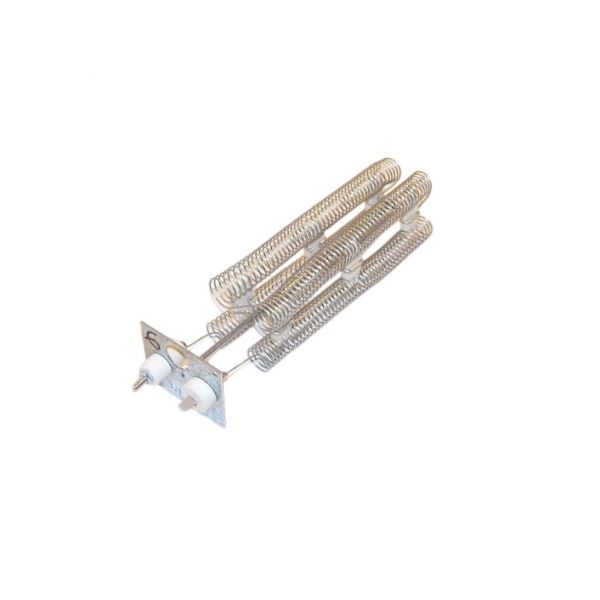
Trane HTR2978 4.8kW Heater Rack 240V

Special Price $124.97 Regular Price $143.72
In stock
SKU
HTR2978
The Trane HTR2978 heater rack has been designed to add extra warmth to the Trane heating and cooling systems. Its length is 17 inches, The electrical heating elements installed on this rack heater assembly are 4.8kW at 240 volts. HTR2978 is a rack heater that transforms electrical energy into heat through incorporated resistance parts and it is used in conjunction with the well suited Trane HVAC equipment. A heater rack is typically controlled by the main HVAC system's thermostat so that it only operates when additional heat is required. For this reason, the Trane heater rack is an added benefit to the Trane HVAC system.
Manufacturer:

https://www.partshnc.com/media/catalog/product/h/t/htr2978.jpg

Specifications

  • Weight: 0.83lbs
  • Length: 17"
  • Voltage: 240V
  • Type: Heater Rack
Manufacturer Name: Trane
Product Number: HTR2978
OEM Part Number: HTR2978
Product Description: 4.8Kw 240V Heater Rack
Weight:0.83lbs/376.48g

Choose the best HVAC equipment parts and supplies from PartsHnC!

  • Same Day Shipping

  • Best Quality And Best Price

  • Wide Range of Inventory

  • Best Customer Service

Have More Questions or Need Help to Place The Order?
Reach us at (866)773-0907 or [email protected]

Write Your Own Review
You're reviewing:Trane HTR2978 4.8kW Heater Rack 240V
Your Rating
Customer Questions
What maintenance is required for the Trane HTR2978 Heater Rack?

Inspect electrical connections and heater elements regularly to ensure better operation. Remove dust buildup and check mounting integrity to prevent overheating or vibration issues. Periodic inspection can maintain consistent heating performance and reduces risk of electrical faults.

What are common issues with the Trane HTR2978 Heater Rack?

  • Overheating due to restricted airflow or faulty elements.
  • Inconsistent or uneven heat output across zones.
  • Electrical connection failures or intermittent power loss.
  • Control or thermostat response malfunctions.
  • Vibration or noise from loose mounting components.

Installation Steps

Step 1: Switch off power and isolate, check zero voltage.

Step 2: Remove old heater rack and inspect mounting rails area.

Step 3: Position the new heater rack into bracket and secure firmly.

Step 4: Connect electrical terminals as per wiring diagram ensuring tight connections.

Step 5: Restore power gradually and test heating output.