Facebook Pixel

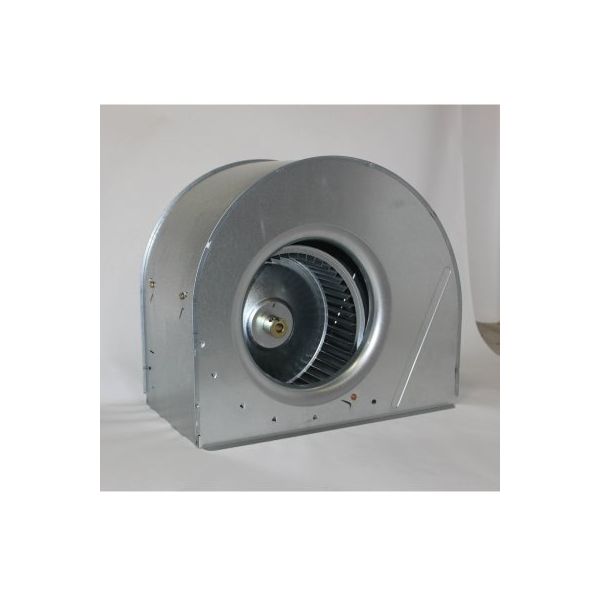
Carrier 342890-75103 Blower Housing/Wheel Assembly

Special Price $475.12 Regular Price $527.39
Out of stock
SKU
342890-75103
The Carrier 342890-75103 Blower Housing/Wheel Assembly is a replacement part that is essential in Carrier HVAC systems. This single unit is the blower housing and wheel assembly and is 21” long, 17½” wide, and 13” high. The housing surrounds the blower wheel, a fan-like structure that spins within the unit to move air through in the system. This way you assure that there is proper airflow within the HVAC assembly and that the assembly itself is not worn or damaged. This leads to the circulation of heat or cool air throughout your house.
https://www.partshnc.com/media/catalog/product/3/4/342890-75103_carrier_partshnc.jpg

Specifications

  • Length: 21 "
  • Width: 17.5 "
  • Height: 13 "
  • Weight: 15.66lbs
Manufacturer Name: Carrier
Product Number: 342890-75103
OEM Part Number: 342890-75103
Product Description: Blower Housing/Wheel Assy
Weight:15.66lbs/7103.25g

Choose the best HVAC equipment parts and supplies from PartsHnC!

  • Same Day Shipping

  • Best Quality And Best Price

  • Wide Range of Inventory

  • Best Customer Service

Have More Questions or Need Help to Place The Order?
Reach us at (866)773-0907 or [email protected]

Write Your Own Review
You're reviewing:Carrier 342890-75103 Blower Housing/Wheel Assembly
Your Rating
Customer Questions
What maintenance is required for the Carrier 342890-75103 Blower Housing Wheel Assembly?

Blower housing wheel assemblies should be cleaned regularly to remove dust buildup and debris, ensuring balanced airflow. Inspect for cracks or imbalance to prevent vibration damage. Always disconnect power before servicing to ensure safety.

What are common issues with the Carrier 342890-75103 Blower Housing Wheel Assembly?

  • Imbalanced blower wheel causing vibration and noise issues.
  • Dust buildup on wheel reducing airflow efficiency issues.
  • Cracks in housing leading to rattling and instability.
  • Loose mounting or misalignment affecting performance.

Installation Steps

Step 1: Turn off power and verify zero voltage.

Step 2: Remove access panel and note wiring.

Step 3: Disconnect motor leads.

Step 4: Unbolt and remove old blower housing.

Step 5: Fit new blower housing assembly and align mounting points.

Step 6: Reconnect wiring securely.

Step 7: Replace panel and test operation.