Facebook Pixel

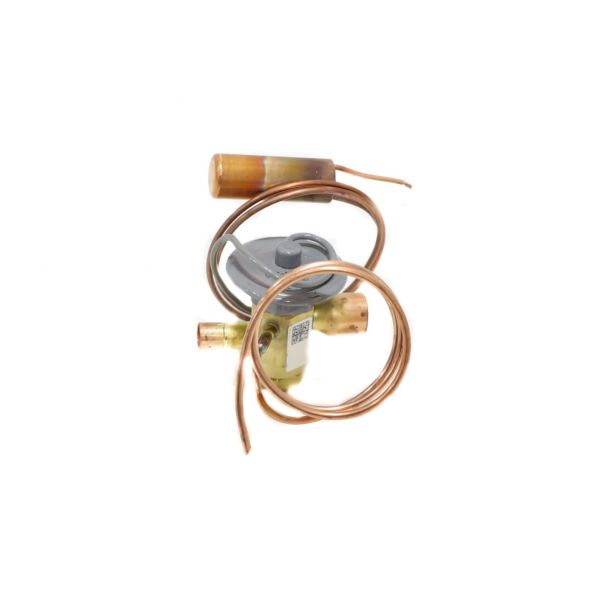
ClimateMaster 33B0002N10 Thermal Expansion Valve (TXV)

Special Price $63.04 Regular Price $111.95
In stock
SKU
33B0002N10
The ClimateMaster 33B0002N10 Thermal expansion valve is an essential part of HVAC systems. This valve controls the coolant which circulates through the evaporator coil. It works by detecting the refrigerant temperature and high pressure when it is leaving the evaporator. In case the refrigerant is too warm, meaning the cooling process is not efficient enough, the TXV will open even wider, to let in more refrigerant. The correct TXV such as this one helps in increasing the efficiency of energy, lowering the stress on the compressor, and extending the durability of the HVAC systems.
Manufacturer:

https://www.partshnc.com/media/catalog/product/3/3/33b0002n10.jpg

Specifications

  • Type: Thermal Expansion Valve
    Manufacturer Name: ClimateMaster
    Product Number: 33B0002N10
    OEM Part Number: 33B0002N10
    Product Description: Txv
    Weight:0.9lbs/408.23g

    Choose the best HVAC equipment parts and supplies from PartsHnC!

    • Same Day Shipping

    • Best Quality And Best Price

    • Wide Range of Inventory

    • Best Customer Service

    Have More Questions or Need Help to Place The Order?
    Reach us at (866)773-0907 or [email protected]

    Write Your Own Review
    You're reviewing:ClimateMaster 33B0002N10 Thermal Expansion Valve (TXV)
    Your Rating
    Customer Questions
    What maintenance is required for the ClimateMaster 33B0002N10 Thermal Expansion Valve?

    Regularly inspect the valve for leaks, corrosion, or debris buildup. Ensure connections are tight and clean any accumulated dirt gently. Check refrigerant flow to confirm proper operation. Always follow safety precautions when handling pressurized systems.

    What are common issues with the ClimateMaster 33B0002N10 Thermal Expansion Valve?

    • Irregular refrigerant flow.
    • Valve sticking or freezing.
    • Pressure fluctuations in the system.
    • Leaking seals or connections.
    • Reduced cooling performance.

    Installation Steps

    Step 1: Turn off all power and refrigerant supply to the system for safety.

    Step 2: Remove the access panels and locate the existing TXV.

    Step 3: Disconnect refrigerant lines and carefully remove the old TXV.

    Step 4: Install the new TXV, ensuring proper orientation and secure connections.

    Step 5: Evacuate and recharge the system as needed, restore power, and test for proper operation.