
Facebook Pixel

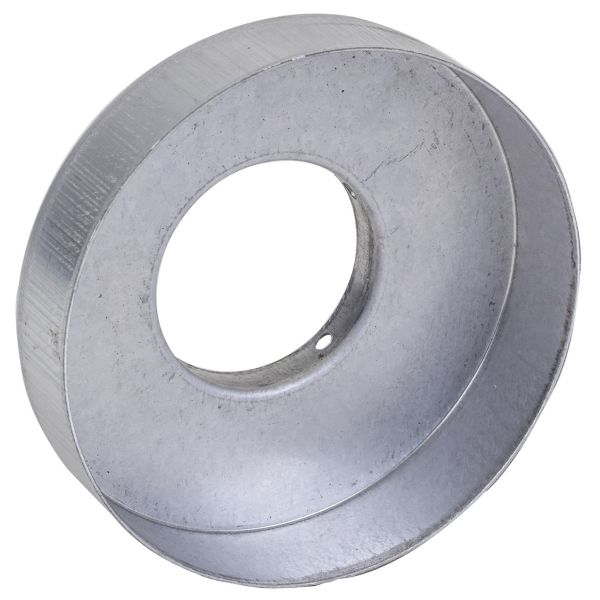
Sterling HVAC 257R05062 Flue Collar

Special Price $75.24 Regular Price $86.52
Out of stock
SKU
257R05062
The Sterling HVAC 257R05062 Flue Collar is a sealed duct connection that is used to provide a safe passage between the flue outlet of heating equipment and the venting system. In HVAC systems, it is connected to the aperture of the flue, which is aligned to the vent pipe to direct the combustion gases out of the enclosure safely. The collar is fitted with ordinary fasteners and sealant where needed in order to make sure that there is no leakage and that there is a suitable draft.
Manufacturer:
https://www.partshnc.com/media/catalog/product/2/5/257r05062_sterling-hvac_partshnc.jpg
Manufacturer Name: Sterling HVAC
Product Number: 257R05062
OEM Part Number: 257R05062
Product Description: Flue Collar
Weight:0.59lbs/267.62g

Choose the best HVAC equipment parts and supplies from PartsHnC!

  • Same Day Shipping

  • Best Quality And Best Price

  • Wide Range of Inventory

  • Best Customer Service

Have More Questions or Need Help to Place The Order?
Reach us at (866)773-0907 or [email protected]

Write Your Own Review
You're reviewing:Sterling HVAC 257R05062 Flue Collar
Your Rating
Customer Questions
What maintenance is required for the Sterling HVAC 257R05062 Flue Collar?

Inspect the flue collar regularly for corrosion, soot buildup, and loose fittings to ensure proper exhaust flow. Clean debris and tighten mounting hardware to secure the seal. Regular maintenance supports preventing leaks and ensures safe venting of combustion gases.

What are common issues with the Sterling HVAC 257R05062 Flue Collar?

  • Corrosion from heat/moisture exposure.
  • Loose or detached fittings causing instability.
  • Exhaust gas leaks from poor sealing.
  • Warping or deformation under high temperatures.
  • Soot buildup causing partial blockage.
  • Vibration noise during system operation.

Installation Steps

Step 1: Turn off power and ensure the heating unit is completely cool.

Step 2: Disconnect the existing flue pipe from the old collar.

Step 3: Remove mounting screws and detach the old flue collar.

Step 4: Position the new flue collar over the exhaust outlet, aligning holes.

Step 5: Secure with screws and reconnect the flue pipe tightly.

Step 6: Check for proper seal to secure gas leaks and restore system operation.