Facebook Pixel

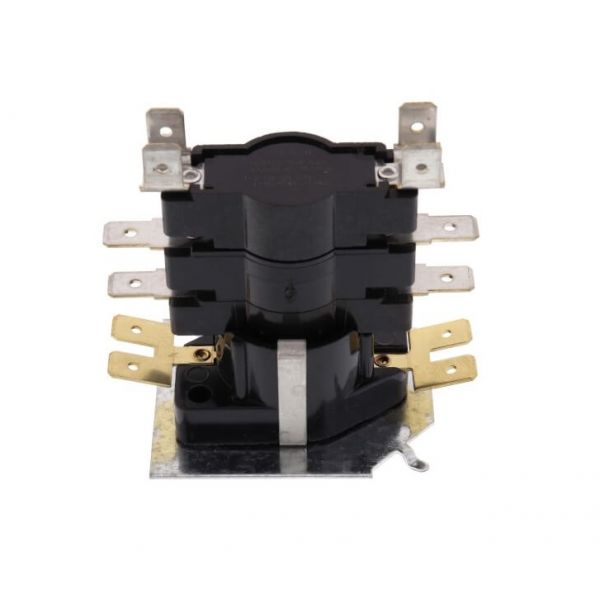
Lennox 12J17 DPDT Normally Opening Sequencer Relay 24V

Special Price $63.47 Regular Price $72.99
In stock
SKU
12J17
The Lennox 12J17 is a Sequencer Relay Normally Open, a component usually used with HVAC equipment, generally furnaces and air handlers. This small box works as a director for electrical current, deciding when and to which heater it should go next. As intended to operate in a wide variety of electrical frequencies of 50/60 Hz, it is suitable for most electrical grids. It enables a staged operation by controlling the timing of power delivery to heating elements. This means the furnace can start as low as the smaller stage and then build up to full power depending on the requisite, meaning a possibility of saving on power.
https://www.partshnc.com/media/catalog/product/1/2/12j17.jpg

Specifications

  • Measure: Unit
  • Depth: 1.625 Inch
  • Width: 2.57 Inch
  • Type: Sequencer Relay
  • Delay Timing: Varied
  • Frequnecy: 50/60 Hz
  • Weight: 0.47lbs
Manufacturer Name: Lennox
Product Number: 12J17
OEM Part Number: 12J17
Product Description: 24V Dpdt N/O Sequencer Relay
Weight:0.47lbs/213.19g

Choose the best HVAC equipment parts and supplies from PartsHnC!

  • Same Day Shipping

  • Best Quality And Best Price

  • Wide Range of Inventory

  • Best Customer Service

Have More Questions or Need Help to Place The Order?
Reach us at (866)773-0907 or [email protected]

Write Your Own Review
You're reviewing:Lennox 12J17 DPDT Normally Opening Sequencer Relay 24V
Your Rating
Customer Questions
What maintenance is required for the Lennox 12J17 Normally Opening Sequencer Relay?

Inspect relay terminals for secure connections and signs of arcing or corrosion to ensure dependable switching. Keep surrounding components clean to prevent dust interference with timing operation. Verify voltage input stability for proper sequencing performance. Regular checks can maintain accurate HVAC system staging and prevent control delays.

What are common issues with the Lennox 12J17 Normally Opening Sequencer Relay?

  • Delayed or incorrect switching sequence timing.
  • Relay failure to energize or de-energize properly.
  • Contact wear leading to inconsistent operation.
  • Heat-related degradation affecting relay accuracy.

Installation Steps

Step 1: Disconnect power and confirm isolation.

Step 2: Remove old relay, note wiring positions.

Step 3: Mount new relay onto control panel securely.

Step 4: Connect coil and load terminals per wiring diagram.

Step 5: Tighten all terminals and check connections.

Step 6: Restore power and test sequencing delay operation.