
Facebook Pixel

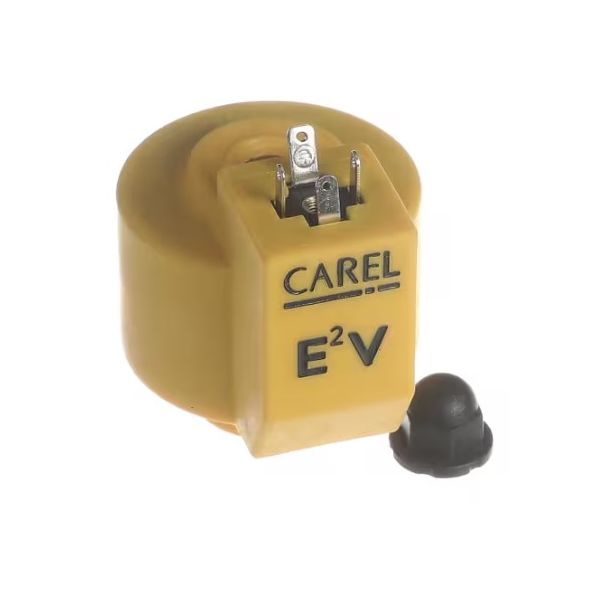
Heatcraft Refrigeration 22531603 Coil Stator E2VSTA02E1

Special Price $103.56 Regular Price $119.09
In stock
SKU
22531603
Heatcraft Refrigeration 22531603 Coil-Stator is a high-performance component for precision control in HVAC systems. It converts electrical energy into magnetic force allowing the exact modulation of electronic expansion valves in refrigeration and air conditioning equipment. The second part here makes sure that refrigerant flow is optimal. Used in commercial refrigeration units and sophisticated HVAC systems, it increases energy efficiency, allows for exact temperature control, and minimizes system component Damage. It’s a robust construction which is compatible with modern equipment and is a reliable choice to maintain the High performance for demanding condition.
https://www.partshnc.com/media/catalog/product/2/2/22531603.jpg

Specifications

  • Type: Coil Stator
  • Part Number: E2VSTA02E1
Write Your Own Review
You're reviewing:Heatcraft Refrigeration 22531603 Coil Stator E2VSTA02E1
Your Rating
Customer Questions
What maintenance is required for the Heatcraft Refrigeration 22531603 Coil Stator?

Inspect the coil stator regularly for dust, debris, or signs of wear. Ensure connections are secure and free from corrosion. Check for proper alignment and clean surrounding components to prevent overheating. Always disconnect power before performing any inspections.

What are common issues with the Heatcraft Refrigeration 22531603 Coil Stator?

  • Electrical winding failures.
  • Overheating during operation.
  • Short circuits or insulation breakdown.
  • Vibration or misalignment issues.
  • Reduced efficiency due to dust or debris buildup.

Installation Steps

Step 1: Isolate power supply, confirm de-energized condition before starting work.

Step 2: Remove access panel, discharge static electricity, and carefully disconnect the wiring harness.

Step 3: Position new Coil Stator correctly, align mounting points, and secure without damaging coil fins.

Step 4: Reconnect electrical terminals according to wiring diagram and tighten all connections firmly.

Step 5: Restore panel, re-energize system, and test operation; check for noise, vibration, overheating,