Facebook Pixel

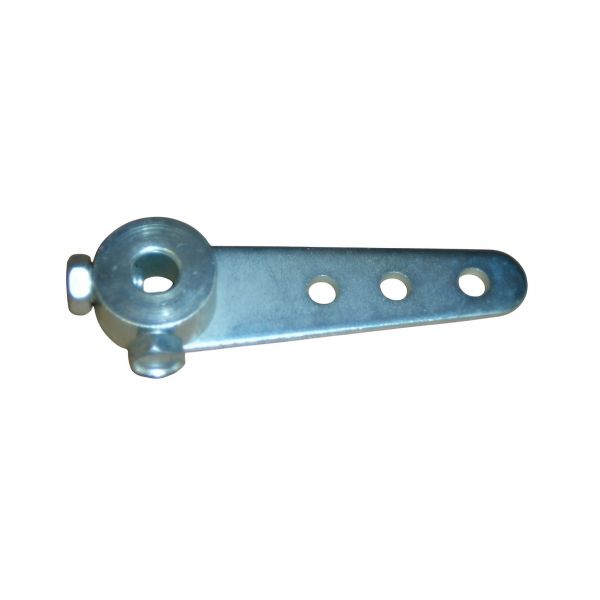
Valley Tool Damper Parts 1415 3-Hole Crank Arm 1/2" Shaft

Special Price $13.26 Regular Price $17.24
In stock
SKU
1415
The Valley Tool Damper Parts 1415 3-Hole Crank Arm is a mechanical linkage part that is used to transfer a motion between an actuator and a damper shaft. The arm is attached to a 1/2-inch diameter shaft and offers three connection holes that enable the adjustment of the position of linkage and movement range damper in HVAC systems. The actuator or control linkage rotational movement is passed through the crank arm to open or close the damper blade attached. It is placed on the shaft in the airflow control assembly and allows the airflow to be adjusted in the duct system under control during equipment operation.
https://www.partshnc.com/media/catalog/product/1/4/1415.jpg
Manufacturer Name: Valley Tool Damper Parts
Product Number: 1415
OEM Part Number: 1415
Product Description: 3-Hole Crank Arm 1/2"Shaft
Weight:0.18lbs/81.65g

Choose the best HVAC equipment parts and supplies from PartsHNC!

  • Same Day Shipping

  • Best Quality And Best Price

  • Wide Range of Inventory

  • Best Customer Service

Have More Questions or Need Help to Place The Order?
Reach us at (866)773-0907 or [email protected]

Write Your Own Review
You're reviewing:Valley Tool Damper Parts 1415 3-Hole Crank Arm 1/2" Shaft
Your Rating
Customer Questions
What maintenance is required for the Valley Tool Damper Parts 1415 Crank Arm?

Inspect crank arm connections regularly for looseness and tighten hardware as needed. Lubricate pivot points to ensure smooth operation and reduce damage. Keep components free from debris and corrosion for accurate damper performance over time.

What are common issues with the Valley Tool Damper Parts 1415 Crank Arm?

  • Loose crank arm causing inconsistent damper movement.
  • Wear at pivot points leading to noisy operation.
  • Corrosion on metal parts affecting smooth rotation.
  • Misalignment of connection reducing efficiency.

Installation Steps

Step 1: Turn off equipment and ensure damper system is fully disengaged for safety.

Step 2: Align the shaft with the crank arm hub and verify fit.

Step 3: Slide crank arm onto shaft and position according to required rotation angle.

Step 4: Secure using appropriate fasteners through the mounting pattern.

Step 5: Tighten evenly and test manual movement for smooth operation and clearance.

Step 6: Confirm alignment and ensure no binding before restoring power to system.