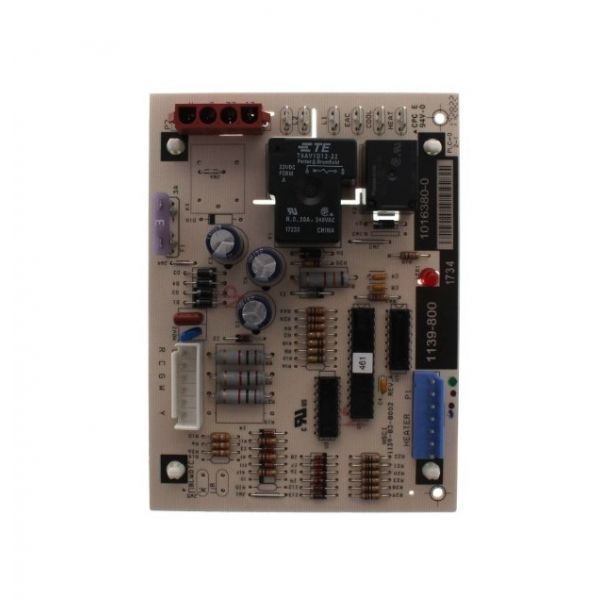
Nordyne 1016380R PC Control Board
Specifications
- Type: Control Board
Loyalty Program| Manufacturer Name: Nordyne Product Number: 1016380R OEM Part Number: 1016380R Product Description: The Nordyne 1016380R circuit board in an HVAC (Heating, Ventilation, and Air Conditioning) system is a critical component responsible for managing and controlling various functions of the system. The PC/Control Board serves as the central control unit for the HVAC system, acting as its "brain." It receives input from various sensors and thermostats and sends signals to different components to ensure proper operation. It interfaces with the thermostat to receive temperature and user input commands, allowing users to set their desired heating or cooling preferences. The board incorporates safety controls to monitor critical parameters like system pressure, temperature, and electrical currents, it can shut down the system to prevent damage or hazards. It controls the sequencing and timing of various components, such as the compressor, blower motor, and condenser fan so that it ensures that these parts work together efficiently. For heat pump systems, the PC/Control Board manages the defrost cycle, ensuring the outdoor coil doesn't freeze up during cold weather. It enables users to switch between different operating modes, such as heating, cooling, fan-only, and auto mode, based on their comfort requirements. The board plays a crucial role in optimizing energy efficiency by controlling when and how HVAC components operate and reducing energy consumption and associated costs. The Nordyne 1016380R circuit board controls and coordinates various functions to ensure efficient and reliable heating and cooling performance while providing user-friendly features and diagnostics for maintenance and troubleshooting. Weight:0.63lbs/285.76g |
Same Day Shipping
Best Quality And Best Price
Wide Range of Inventory
Best Customer Service
Step1: Turn off power to the furnace or air handler to prevent electric shock.
Step2: Open the control panel and carefully disconnect wiring from the old board, noting connections.
Step3: Mount the new control board in place and reconnect all wires to matching terminals.
Step4: Close the panel, restore power, and test the system to confirm proper operation.