Facebook Pixel

Wayne Combustion 100610-005 Oil Valve 12VDC

Special Price $120.76 Regular Price $138.88
Out of stock
SKU
100610-005
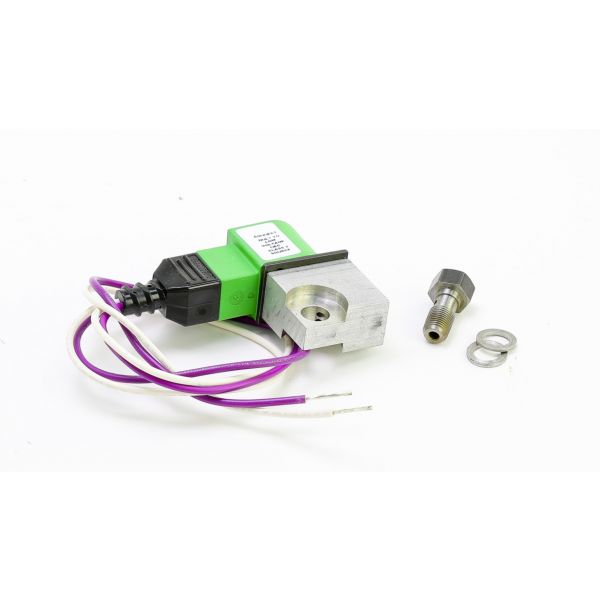
The Wayne Combustion 100610-005 Oil Valve is designed to control the flow of oil in HVAC systems and perform optimally in terms of efficiency and durability. It used a 12VDC supply to regulate the flow of oil depending on the requirement of the system. There is an internal solenoid that opens or closes the valve to regulate the flow of oil to the burner. It is widely applied to oil-fired furnaces and boilers to improve fuel efficiency and combustion management. As a result, the wasted energy is minimized, and equipment durability and cleaner system operation are ensured, together with dependent shut-off capacity and a smoothly supplied laminar oil flow.
https://www.partshnc.com/media/catalog/product/1/0/100610-005.jpg

Specifications

  • Type: Oil Valve
  • Voltage: 12VDC
Manufacturer Name: Wayne Combustion
Product Number: 100610-005
OEM Part Number: 100610-005
Product Description: Oil Valve 12Vdc
Weight:0.61lbs/276.69g

Choose the best HVAC equipment parts and supplies from PartsHnC!

  • Same Day Shipping

  • Best Quality And Best Price

  • Wide Range of Inventory

  • Best Customer Service

Have More Questions or Need Help to Place The Order?
Reach us at (866)773-0907 or [email protected]

Write Your Own Review
You're reviewing:Wayne Combustion 100610-005 Oil Valve 12VDC
Your Rating
Customer Questions
What maintenance is required for the Wayne Combustion 100610-005 Oil Valve?

Inspect the valve body and fittings for seepage or residue that could indicate leakage. Keep electrical leads firmly connected and free from corrosion. Periodically observe fuel delivery to confirm stable opening and closing action during burner operation.

What are common issues with the Wayne Combustion 100610-005 Oil Valve?

  • Fuel flow interruption occurring.
  • Valve sticking in position.
  • Electrical signal not activating.
  • Leakage around fittings.
  • Delayed valve response.

Installation Steps

Step 1: Turn off power and fuel supply, relieve pressure, verify system is de-energized.

Step 2: Remove old valve, note flow direction and wiring connections for reference.

Step 3: Install new valve in correct orientation, secure fittings and reconnect fuel lines.

Step 4: Reconnect wiring, ensure tight electrical connections and grounding.

Step 5: Restore power, check for leaks, test operation and ensure safe ignition before use.