Facebook Pixel

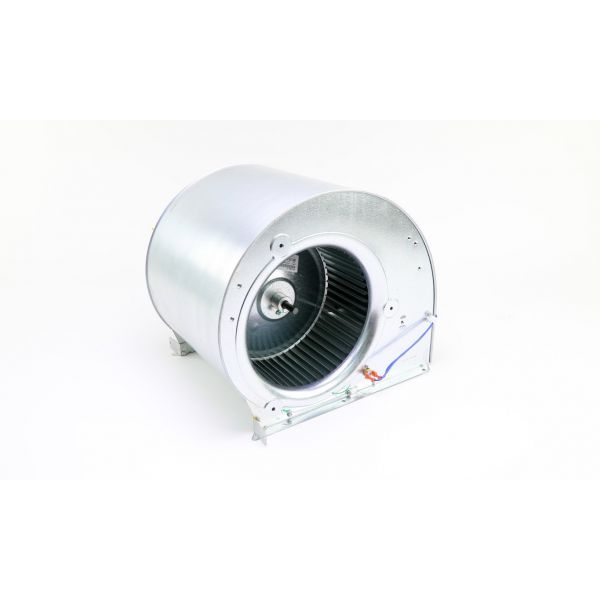
Nordyne 1003481 Blower Assembly Complete W/Motor

Special Price $529.55 Regular Price $587.80
In stock
SKU
1003481
The Nordyne 1003481 blower assembly with motor is an indispensable part of HVAC systems, especially when it comes to furnaces or air handlers. It contains a motor for driving the blower wheel that circulates hot air through the house. This combination allows for better heat transfer therefore making your living conditions more habitable. The fact that this unit works with several other Nordyne and Goodman HVAC equipment makes it a reliable and easy option for replacement. Advantages include higher airflow, improved heating efficiency and reduced electrical consumption.
Manufacturer:
https://www.partshnc.com/media/catalog/product/1/0/1003481-nordyne_partshnc.jpg

Specifications

  • Type: Blower Assembly
  • Blower Wheel: 667280R
  • Run Capacitor: 01-0026
Manufacturer Name: Nordyne
Product Number: 1003481
OEM Part Number: 1003481
Product Description: Blower Assembly Complete W/Mtr
Weight:38.5lbs/17463.29g

Choose the best HVAC equipment parts and supplies from PartsHnC!

  • Same Day Shipping

  • Best Quality And Best Price

  • Wide Range of Inventory

  • Best Customer Service

Have More Questions or Need Help to Place The Order?
Reach us at (866)773-0907 or [email protected]

Write Your Own Review
You're reviewing:Nordyne 1003481 Blower Assembly Complete W/Motor
Your Rating
Customer Questions
What maintenance is required for the Nordyne 1003481 Blower Assembly?

Regularly clean the blower blades and housing to remove dust and debris. Check that the motor mounts and wiring are secure. Lubricate bearings if applicable and ensure proper airflow. Always disconnect power before servicing to prevent injury.

What are common issues with the Nordyne 1003481 Blower Assembly?

  • Reduced airflow or uneven air distribution.
  • Motor overheating or failure.
  • Unusual noises such as rattling or grinding.
  • Imbalanced or misaligned blower wheel.

Installation Steps

Step 1: Turn off all power to the HVAC system before beginning.

Step 2: Remove the access panel and disconnect the old blower assembly wiring.

Step 3: Unscrew and slide out the existing blower assembly.

Step 4: Position the new blower assembly complete with motor and secure mounting hardware.

Step 5: Reconnect all electrical wiring per the manufacturer’s diagram.

Step 6: Restore power and test airflow and operation for proper performance.