Facebook Pixel

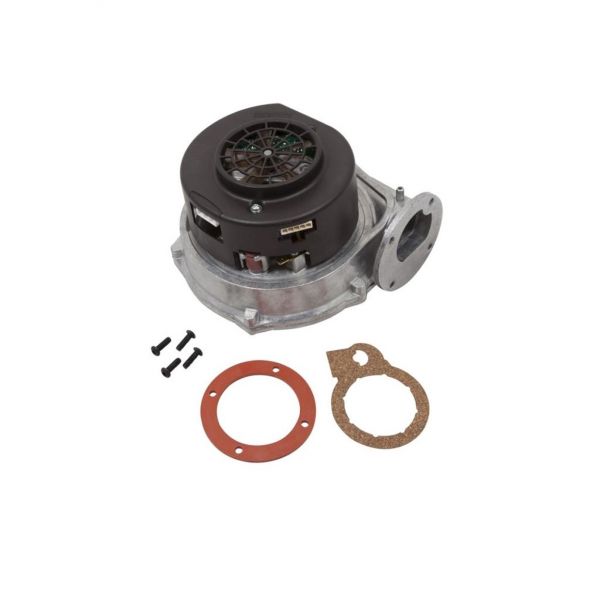
Lochinvar & A.O. Smith 100113146 Blower Assembly Vertex-100

Special Price $871.40 Regular Price $967.26
In stock
SKU
100113146
The Lochinvar & A.O. Smith 100113146 Blower Assembly is the replacement part used for Vertex-100 water heaters. They will also enhance air flow, and combustion therefore will ensure that water heater is working properly. Compatible with Vertex-100 models, it contributes to efficient ventilation thus minimizing emissions and enhancing energy efficiency. The blower assembly increases the durability of the system by maintaining equal air pressure and thus constant hot water delivery. Well suited for both residential and commercial applications, this component will facilitate easy operations in addition to enhancing compliance with the standard requirements for HVAC equipment.
https://www.partshnc.com/media/catalog/product/1/0/100113146.jpg

Specifications

  • Type: Blower
  • Model: Vertex 100
Manufacturer Name: Lochinvar & A.O. Smith
Product Number: 100113146
OEM Part Number: 100113146
Product Description: Vertex 100 Blower
Weight:4.53lbs/2054.77g

Choose the best HVAC equipment parts and supplies from PartsHnC!

  • Same Day Shipping

  • Best Quality And Best Price

  • Wide Range of Inventory

  • Best Customer Service

Have More Questions or Need Help to Place The Order?
Reach us at (866)773-0907 or [email protected]

Write Your Own Review
You're reviewing:Lochinvar & A.O. Smith 100113146 Blower Assembly Vertex-100
Your Rating
Customer Questions
What maintenance is required for the Lochinvar & A.O. Smith 100113146 Blower Assembly?

Regularly inspect the blower for dust buildup, debris, and loose mounting hardware. Clean the fan blades carefully and ensure the motor is free of obstructions. Lubricate bearings if specified and always disconnect power before servicing.

What are common issues with the Lochinvar & A.O. Smith 100113146 Blower Assembly?

  • Reduced airflow due to dust or debris.
  • Unusual noise from worn bearings.
  • Motor overheating or tripping breakers.
  • Loose or misaligned fan blades affecting performance.

Installation Steps

Step 1: Ensure all power is turned off before handling.

Step 2: Remove the old blower assembly carefully, keeping mounting hardware.

Step 3: Position the new blower assembly and align it with the mounting points.

Step 4: Secure the assembly with screws or bolts, ensuring a firm fit.

Step 5: Reconnect any wiring according to specifications.

Step 6: Restore power and test for proper operation.