Facebook Pixel

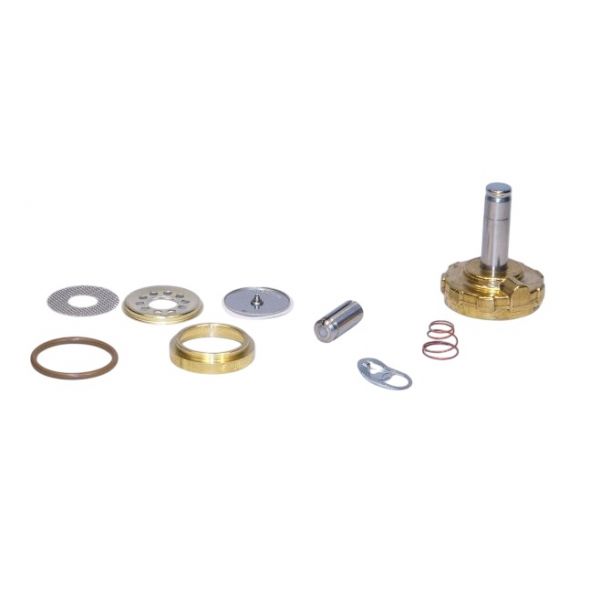
Parker Fluid Control 08FS5C2432ACHR Valve Repair Kit

Special Price $161.14 Regular Price $185.31
In stock
SKU
08FS5C2432ACHR
Parker Fluid Control 08FS5C2432ACHR Valve Repair Kit part is for maintaining and restoring optimal performance of solenoid valves to control fluids in HVAC systems. It is compatible with the required components for repairing and extending the valves used in chillers, refrigeration units, and industrial HVAC systems. It helps reduce or prevent leaks and increases reliability and proper appliance functioning by replacing worn-out parts. This kit is used for regular maintenance which lowers the downtime, increases system efficiency, and subsequently puts downward pressure on the operational expenses.
https://www.partshnc.com/media/catalog/product/0/8/08fs5c2432achr.jpg

Specifications

  • Type: Valve Repair Kit
  • Model: 08FS5C2432ACH
Manufacturer Name: Parker Fluid Control
Product Number: 08FS5C2432ACHR
OEM Part Number: 08FS5C2432ACHR
Product Description: Repair Kit For 08Fs5c2432ach
Weight:0.74lbs/335.66g

Choose the best HVAC equipment parts and supplies from PartsHnC!

  • Same Day Shipping

  • Best Quality And Best Price

  • Wide Range of Inventory

  • Best Customer Service

Have More Questions or Need Help to Place The Order?
Reach us at (866)773-0907 or [email protected]

Write Your Own Review
You're reviewing:Parker Fluid Control 08FS5C2432ACHR Valve Repair Kit
Your Rating
Customer Questions
What maintenance is required for the Parker Fluid Control 08FS5C2432ACHR Valve Repair Kit?

Regularly inspect valve components for wear, corrosion, or leaks when using this repair kit. Ensure proper installation of seals and gaskets, and keep components clean from debris. Routine checks help maintain sealing performance and prevent system malfunctions or pressure loss.

What are common issues with the Parker Fluid Control 08FS5C2432ACHR Valve Repair Kit?

  • Improper sealing due to incorrect installation.
  • Leakage from worn or damaged gaskets.
  • Incompatibility with certain valve models.
  • Premature wear under high pressure or harsh conditions.
  • Reduced performance from degraded internal components.

Installation Steps

Step 1: Turn off system pressure and isolate valve.

Step 2: Depressurize and drain fluid lines.

Step 3: Remove valve cover carefully.

Step 4: Extract worn seals and components.

Step 5: Clean internal surfaces thoroughly.

Step 6: Install new valve kit parts in correct orientation.

Step 7: Reassemble valve and tighten to spec and follow torque specifications.

Step 8: Restore pressure and test for leaks and proper operation.